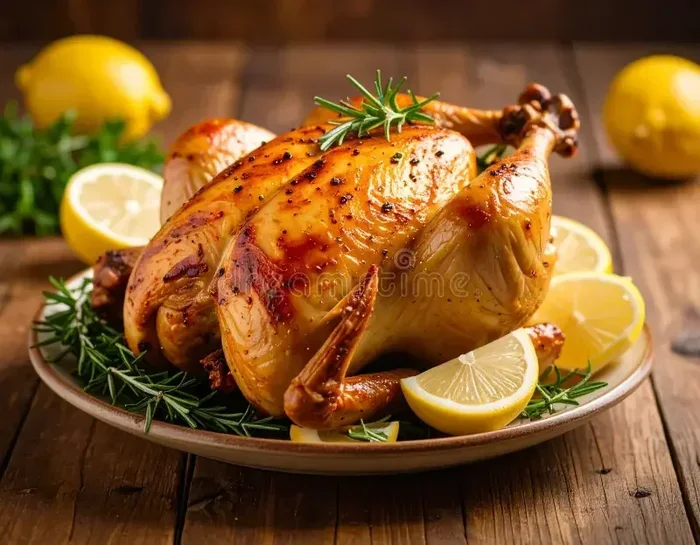
How to Cook a Whole Chicken in the Oven the Right Way
Cooking a whole chicken in the oven is easier than you think. This guide covers everything from choosing the bird to carving the perfect slices. You will learn the right temperature, timing, and seasoning for a juicy, golden-brown roast every single time.
There is something magical about a whole chicken roasting in the oven. The kitchen fills with an aroma that makes everyone gather around. Whether you are a beginner cook or a seasoned home chef, learning how to cook a whole chicken in the oven is one of the most rewarding skills you can build.
This guide walks you through every single step. From picking the right bird at the store to slicing it up at the table, we have you covered. You will discover the best oven temperature, the ideal cooking time, and the seasoning combinations that turn a simple chicken into a showstopper. By the end, you will feel confident enough to make this whole chicken recipe your weeknight go-to.
Key Takeaways
- Use 425°F for crispy skin: This temperature renders fat quickly and gives you a beautifully golden crust.
- Aim for 20 minutes per pound: This rule of thumb helps you estimate cooking time accurately.
- Always use a meat thermometer: The internal temperature should reach 165°F in the thickest part of the thigh.
- Rest the chicken for 15-20 minutes: This locks in juices and makes carving much easier.
- Dry the skin before seasoning: Patting the chicken dry is the secret to ultra-crispy skin.
- Stuff the cavity for extra flavor: Herbs, lemon, and garlic inside the bird add incredible depth.
- Let the pan drippings do the work: They make the best gravy or sauce you will ever taste.
📑 Table of Contents
- Why Oven-Roasted Whole Chicken Is the Best Choice
- Choosing the Right Whole Chicken
- Seasoning and Preparing Your Chicken
- Oven Temperature and Cooking Time
- Resting and Carving Your Chicken
- Common Mistakes to Avoid
- Serving Ideas and Side Dishes
- Expert Tips for the Best Roast Chicken
- Storing and Reheating Leftovers
- Frequently Asked Questions
- Conclusion
Why Oven-Roasted Whole Chicken Is the Best Choice
You might wonder why so many people swear by the oven method. The answer is simple. It is hands-off, forgiving, and produces incredible results with minimal effort.
Unlike stovetop cooking or grilling, an oven roasted chicken cooks evenly from all sides. The dry heat surrounds the bird and crisps the skin while keeping the meat moist inside. You do not need to flip anything or watch it constantly. Once the chicken goes in, you are free to prep sides or relax.
Here are a few reasons why this method wins:
- Minimal hands-on time: Season it, pop it in, and wait.
- Predictable results: The oven does the heavy lifting for you.
- Versatile: You can cook for two or for a full family gathering.
- Budget-friendly: A whole chicken costs less per pound than individual cuts.
- One-pot meal: The juices left behind make amazing gravy.
Once you master this technique, you will never go back to buying packaged rotisserie chickens again. The flavor, the texture, and the satisfaction are on a completely different level.
Choosing the Right Whole Chicken
The foundation of a great roast starts at the grocery store. Not all chickens are created equal, and picking the right one makes a huge difference.
Fresh vs Frozen
Fresh whole chickens tend to have better texture and moisture. They cook more evenly and the skin crisps up nicely. That said, a frozen chicken works perfectly fine too. Just make sure you thaw it completely in the refrigerator for 24 to 48 hours before cooking.
Never thaw a chicken on the counter. Bacteria can grow quickly on the outer layers while the inside is still frozen. The refrigerator method is the safest way to defrost poultry.
Size Matters
For most families, a 4 to 5 pound bird is the sweet spot. It fits comfortably in a standard roasting pan and cooks through evenly. Here is a simple guide to help you choose:
- 2 to 3 pounds: Great for 2 to 3 people.
- 4 to 5 pounds: Serves 4 to 6 people comfortably.
- 6 to 7 pounds: Perfect for a crowd or meal prep.
Look for a chicken with plump breasts and smooth, unbroken skin. Avoid birds that smell off or have loose, saggy skin. These are signs of poor quality or improper handling.
Organic, Free-Range, or Conventional?
You will see many labels at the store. Organic and free-range chickens often come from birds raised without antibiotics and with more space to move. This can affect the flavor and texture slightly. However, a conventional whole chicken still makes a delicious roast when seasoned and cooked properly. Choose what fits your budget and values.
Seasoning and Preparing Your Chicken
This is where the magic happens. Proper preparation transforms a plain bird into a flavor-packed masterpiece. Do not skip these steps.
Dry the Skin
The single most important tip for crispy skin is to dry the chicken thoroughly. Remove the packaging and pat the entire bird dry with paper towels. Do this inside and out. The drier the surface, the crispier the skin will get.
For even better results, place the uncovered chicken on a rack in the refrigerator for a few hours or overnight. This air-drying technique pulls moisture away from the skin and leads to the crispiest possible finish.
Season Generously
Seasoning is not just about salt. You want layers of flavor that reach every bite. Start with a good coating of olive oil or melted butter all over the bird. This helps the seasonings stick and promotes even browning.
Here is a simple yet powerful seasoning blend:
- 1 tablespoon kosher salt
- 1 teaspoon black pepper
- 1 teaspoon garlic powder
- 1 teaspoon smoked paprika
- 1/2 teaspoon onion powder
- 1/2 teaspoon dried thyme
Rub the mixture under the skin of the breasts and all over the outside. Seasoning under the skin is a game changer. It puts the flavor right next to the meat where it matters most.
Stuff the Cavity
Stuffing the inside of the chicken adds a subtle, aromatic flavor to the meat as it cooks. Classic options include:
- Half a lemon squeezed and placed inside
- A few sprigs of fresh rosemary and thyme
- Two or three garlic cloves, smashed
- A small onion, quartered
You do not need to pack the cavity tightly. Just toss the ingredients in loosely. They will release their oils and juices as the chicken cooks, infusing the meat from the inside out.
Truss the Bird
Trussing means tying the legs together and tucking the wings under the body. This might sound fussy, but it serves a real purpose. It helps the chicken cook more evenly and keeps the breast meat moist by preventing it from drying out too quickly.
Use kitchen twine to tie the legs together snugly. Then fold the wing tips behind the bird. It only takes a minute and makes a noticeable difference in the final result.
Oven Temperature and Cooking Time
This is the section most people get wrong. Getting the oven temperature for chicken right is the difference between dry, overcooked meat and juicy, tender perfection.
The Best Temperature to Cook a Whole Chicken
Set your oven to 425°F. This high heat does three important things. First, it renders the fat under the skin quickly. Second, it creates a golden-brown, crispy exterior. Third, it cooks the chicken through without drying out the interior.
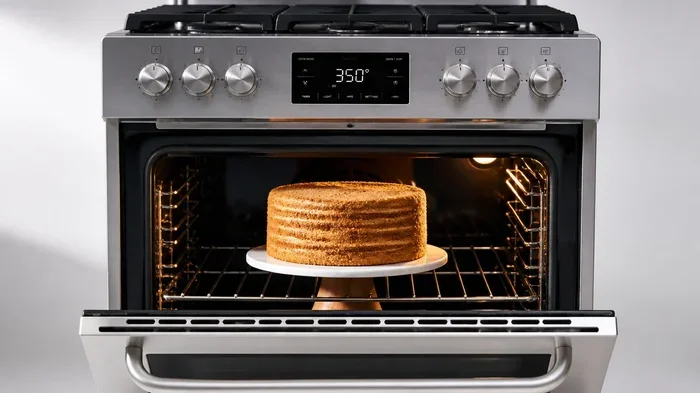
Some recipes call for lower temperatures like 350°F or 375°F. Those work too, but they take much longer. The extended cook time increases the chance of the breast meat drying out. For the best results, stick with 425°F.
How Long to Cook a Whole Chicken
The general rule is about 20 minutes per pound at 425°F. Here is a quick reference chart:
- 3 to 4 pounds: 60 to 80 minutes
- 4 to 5 pounds: 80 to 100 minutes
- 5 to 6 pounds: 100 to 120 minutes
These times are estimates. The only way to know for sure is to use a meat thermometer. Insert it into the thickest part of the thigh, avoiding the bone. When the internal temperature chicken reaches 165°F, it is done.
Should You Cover the Chicken?
Do not cover the chicken during roasting. You want the hot air to circulate freely around the bird. Covering it traps steam and prevents the skin from crisping up. If the breast is browning too quickly, you can loosely tent it with foil for the last 15 minutes of cooking. But leave it uncovered for the majority of the roast.
Basting for Moisture
Basting means spooning the pan juices over the chicken every 20 to 30 minutes. This keeps the skin moist and adds flavor. It also gives you beautiful, even browning. If you are too busy to baste, just make sure the chicken has enough fat or butter on it to self-baste.
Resting and Carving Your Chicken
This step is so important that many experienced cooks consider it half the process. Resting the chicken after it comes out of the oven makes the meat juicier and easier to carve.
Why Resting Matters
When the chicken is cooking, the juices are pushed toward the center of the meat. If you cut into it right away, those juices run out onto the cutting board instead of staying in the meat. Resting allows the juices to redistribute evenly throughout the bird.
Let the chicken rest for at least 15 to 20 minutes before carving. Tent it loosely with foil to keep it warm. The internal temperature will actually continue to rise by a few degrees during this time, which is perfectly fine.
How to Carve Like a Pro
Carving a whole chicken looks intimidating, but it is actually quite simple once you know the steps:
- Remove the twine and pull out the stuffing from the cavity.
- Cut through the skin between the leg and the body.
- Pull the leg outward and cut through the joint to separate it.
- Repeat on the other side.
- Slice along the breastbone to remove each breast half.
- Cut the breast meat into slices against the grain.
Serve the pieces on a platter with the pan drippings spooned over the top. Your family and guests will be impressed.
Common Mistakes to Avoid
Even experienced cooks sometimes make mistakes when preparing a whole chicken. Here are the most common pitfalls and how to avoid them.
Not Bringing the Chicken to Room Temperature
Take the chicken out of the refrigerator 30 to 45 minutes before cooking. A cold bird placed in a hot oven will cook unevenly. The outside might be done while the inside is still raw. Letting it sit at room temperature helps it cook more consistently.
Overcooking the Breast
The breast meat dries out faster than the thighs and legs. If you are worried about this, you can start the chicken breast-side down for the first 30 minutes. Then flip it breast-side up to finish. This keeps the breast protected and moist.
Skipping the Meat Thermometer
Guessing whether the chicken is done is a risky move. Invest in a simple digital meat thermometer. It takes the guesswork out completely and ensures your poultry cooking tips actually work. The thermometer is the single best tool for perfect roast chicken.
Crowding the Pan
Give the chicken room to breathe in the roasting pan. If it is too cramped, the hot air cannot circulate properly. The skin will steam instead of crisp. Use a roasting pan or a rimmed baking sheet with a wire rack for the best results.
Forgetting to Season Under the Skin
Seasoning only the outside means the flavor stays on the surface. By gently pushing the skin away from the breast meat and rubbing seasoning directly onto the flesh, you create a burst of flavor in every bite. This is a poultry cooking tip that makes a real difference.
Serving Ideas and Side Dishes
A roast chicken shines on its own, but it pairs beautifully with simple sides. Here are some ideas that complement the bird perfectly:
- Roasted vegetables: Carrots, potatoes, and parsnips cooked in the same pan soak up all those delicious juices.
- Simple salad: A bright green salad with a lemon vinaigrette cuts through the richness of the chicken.
- Crusty bread: Use it to mop up the pan drippings. You will not be able to stop.
- Rice or grains: Fluffy rice or quinoa makes a great base for the chicken and its juices.
- Gravy: The pan drippings make an instant pan gravy with just a little flour and broth.
Leftover chicken is just as versatile. Use it in sandwiches, salads, soups, or tacos the next day. A whole chicken recipe like this gives you meals for days.
Expert Tips for the Best Roast Chicken
Here are some pro-level tips that separate a good roast chicken from a great one:
- Brine overnight: Soaking the chicken in a saltwater solution for 12 to 24 hours before cooking makes the meat incredibly juicy and seasoned throughout.
- Use compound butter: Mix softened butter with herbs and garlic, then slide some under the skin. It melts into the meat as it cooks and adds unbelievable richness.
- Let the chicken sit out: A 30-minute rest at room temperature before roasting promotes even cooking from edge to center.
- High heat at the start: Some cooks start at 450°F for the first 15 minutes, then drop to 425°F. This gives you extra-crispy skin.
- Save the backbone: If you spatchcock the chicken, save the backbone and simmer it into a quick stock for future soups.
These small extra steps take very little effort but elevate the final result dramatically. Once you try them, you will wonder how you ever roasted chicken without them.
Storing and Reheating Leftovers
Do not let leftover chicken go to waste. Store it properly and it will taste great the next day too.
Let the cooked chicken cool to room temperature within two hours. Then place it in an airtight container and refrigerate. It will keep for up to 3 to 4 days in the fridge.
To reheat, use the oven or a skillet rather than the microwave. The microwave tends to make the chicken rubbery. Reheating in the oven at 350°F for about 15 minutes keeps the meat tender and the skin crispy.
You can also freeze cooked chicken for up to 3 months. Wrap it tightly in plastic wrap and foil or place it in a freezer-safe bag. Thaw it overnight in the refrigerator before reheating.
Frequently Asked Questions
How long does it take to cook a whole chicken in the oven?
A 4 to 5 pound chicken at 425°F typically takes about 80 to 100 minutes, or roughly 20 minutes per pound. Always use a meat thermometer to confirm the internal temperature reaches 165°F in the thickest part of the thigh before removing it from the oven.
What is the best internal temperature for a whole chicken?
The USDA recommends an internal temperature of 165°F for poultry. Insert the thermometer into the thickest part of the thigh, making sure it does not touch the bone. The temperature will continue to rise a few degrees as the chicken rests, so pulling it out at 160°F to 162°F is also perfectly safe.
Should I cover a whole chicken when roasting?
No. Leave the chicken uncovered for the entire roasting time. This allows the hot air to circulate around the bird and creates crispy, golden-brown skin. If the breast is browning too fast, you can loosely tent it with foil for the last 15 minutes only.
Can I cook a whole chicken from frozen?
It is not recommended. Cooking a frozen chicken in the oven leads to uneven cooking, where the outside may be overcooked while the inside remains raw. Always thaw the chicken completely in the refrigerator before roasting for the best and safest results.
What is the best way to keep chicken breast moist?
Brining the chicken overnight, seasoning under the skin with butter or oil, and starting breast-side down for the first part of cooking all help keep the breast meat moist. Also, do not overcook the chicken. Pull it off the heat as soon as the thermometer hits 165°F.
What goes best with roast chicken?
Roasted root vegetables like carrots, potatoes, and parsnips are classic pairings. A simple green salad, crusty bread, and homemade gravy made from the pan drippings round out a perfect meal. Leftover chicken also makes fantastic sandwiches and soups.
Conclusion
Cooking a whole chicken in the oven is one of the most satisfying things you can do in the kitchen. It is simple, affordable, and delivers incredible results every time. With the right temperature, proper seasoning, and a little patience, you can create a meal that rivals any restaurant roast.
Start with a good quality bird. Dry the skin, season generously, and roast at 425°F until the internal temperature reaches 165°F. Let it rest before carving, and use those pan drippings to make gravy. These steps are all it takes to turn an ordinary chicken into an extraordinary meal.
Now that you know how to cook a whole chicken in the oven the right way, it is time to put your knowledge to work. Pick up a fresh chicken this weekend, follow these steps, and enjoy the process. You will be amazed at how easy and rewarding it is. Your family will thank you, and you will have a new favorite way to cook dinner.