How To Make Fall Off The Bone Ribs In Your Home Oven
Making fall off the bone ribs in your home oven is easier than you think. With the right low and slow cooking method, a great dry rub, and a little patience, you can enjoy restaurant-quality barbecue ribs without leaving your kitchen. This guide walks you through every step to get perfectly tender, caramelized, and flavorful ribs right in your oven.
There is nothing quite like biting into a rack of fall off the bone ribs that are packed with smoky flavor and glazed to perfection. Many people think you need a fancy smoker or a backyard barbecue pit to achieve this level of deliciousness. The truth is, your home oven can do the same job — and sometimes even better.
Whether you are a weekend griller or a weeknight dinner hero, learning how to make fall off the bone ribs in your oven opens up a world of possibilities. You get consistent results, easy cleanup, and the freedom to cook ribs any day of the year. In this guide, we will walk you through every single step so your next batch of oven ribs turns out amazing.
The process is simpler than most people expect. It is all about low heat, the right seasoning, and giving the meat enough time to become truly tender. By the end of this article, you will have all the knowledge you need to make bone-in ribs that rival any barbecue joint. Let us get started.
Key Takeaways
- Low and slow is the secret: Cooking ribs at a low temperature for several hours breaks down the collagen and makes them tender.
- A good dry rub matters: The flavor of your ribs starts with a well-balanced rub applied hours before cooking.
- Use the 3-2-1 method: This proven technique gives you smoky, tender, and glazed ribs every single time.
- Wrap in foil partway through: Wrapping helps keep moisture locked in and speeds up the cooking process.
- Always use a meat thermometer: Internal temperature is the most reliable way to know your ribs are done.
- Patience pays off: Resist the urge to rush the process. Great ribs need time.
- Glaze at the end: A final layer of barbecue sauce adds flavor and a beautiful caramelized finish.
📑 Table of Contents
Why Oven Ribs Work So Well
Cooking pork ribs in the oven might sound unconventional if you are used to grilling. But oven cooking has some serious advantages. The heat surrounds the meat evenly, which means no hot spots or flare-ups. You also have full control over the temperature, making it much harder to overcook or undercook your ribs.
Another big benefit is convenience. You do not need to stand outside babysitting a smoker for hours. You can set your ribs in the oven, go about your day, and come back to a kitchen full of incredible aroma. The low and slow method works perfectly inside an oven because the enclosed space traps moisture and creates a mini convection environment.
Many pitmasters actually prefer oven cooking for consistency. When you are learning how to make fall off the bone ribs, having a predictable heat source takes a lot of the guesswork out. You can focus on flavor and technique instead of worrying about external factors like wind or weather.
The Science Behind Tender Ribs
Understanding why ribs become tender helps you appreciate the process. Ribs contain a lot of collagen, which is a tough protein found in connective tissue. When you cook ribs at a low temperature for a long time, that collagen breaks down into gelatin. This is what gives tender ribs that silky, melt-in-your-mouth texture.
If you crank the heat too high, the collagen does not have time to break down properly. The result is tough, chewy meat that nobody wants to eat. This is why the low and slow approach is non-negotiable for great oven ribs. Patience truly is the key ingredient.
Choosing the Right Ribs for Oven Cooking
Not all ribs are created equal, and choosing the right type makes a big difference in your final result. The most common options for oven cooking are pork baby back ribs and spare ribs. Each has its own characteristics, and both work beautifully for fall off the bone ribs.
Baby back ribs come from the top of the pig near the backbone. They are smaller, leaner, and cook a bit faster than spare ribs. Many home cooks prefer them because they are more tender and have a slightly milder flavor. Spare ribs come from the lower belly area and are fattier, which means more flavor but also a longer cooking time.
Bone-In vs. Boneless Ribs
For the best results, go with bone-in ribs. The bone acts as a natural heat conductor and helps distribute warmth evenly throughout the meat. It also adds flavor during the long cooking process. Boneless ribs can work, but they tend to dry out faster in the oven.
When shopping for ribs, look for meat that is pink and firm with a good layer of fat. Avoid ribs that look gray or dry. The fat cap on top helps keep the meat moist during the long oven cooking time. A good rack of ribs should have a nice marbling of fat throughout the meat.
How Much Ribs to Buy
A good rule of thumb is to plan for about half a pound of raw ribs per person. If you are feeding a crowd, buy a full rack or even two. Leftover BBQ ribs make amazing sandwiches the next day, so do not worry about making too much.
Preparing Your Ribs Like a Pro
Proper preparation is the foundation of great ribs. Skipping this step is one of the biggest mistakes home cooks make. Taking the time to prep your ribs correctly sets you up for perfectly tender ribs every time.
The first thing you need to do is remove the membrane from the back of the rack. This thin, papery layer of tissue is the rib membrane, and it does not soften during cooking. It can create a chewy, unpleasant texture that ruins an otherwise great rack of ribs.
Removing the Rib Membrane
To remove the membrane, flip the rack so the bone side is facing up. You will see a thin layer of tissue between the bones at one end. Use a butter knife to gently lift a corner of the membrane. Once you have a grip, use a paper towel for better traction and pull it off slowly.
This might take a little practice, but it is worth the effort. Many butchers will remove the membrane for you if you ask at the meat counter. If you are new to cooking bone-in ribs, this is a great tip to remember.
Applying the Dry Rub
The dry rub is where your flavor journey begins. A great rib rub combines salt, brown sugar, paprika, garlic powder, onion powder, black pepper, and a touch of cayenne for heat. The sugar helps create a beautiful caramelized crust, while the spices add depth and complexity.
Apply the rub generously to all sides of the ribs. Use your hands to massage it into the meat. For the best flavor, wrap the ribs in plastic wrap and refrigerate them for at least two hours, or overnight if you have time. This gives the dry rub time to penetrate the meat and tenderize it from the inside.
Quick Tips for the Perfect Rub
- Balance sweet and savory: Brown sugar and salt should be the base of your rub.
- Do not skip the paprika: It adds color and a subtle smokiness.
- Let it rest: Overnight refrigeration produces the best flavor absorption.
- Adjust heat to taste: Cayenne and chili powder can be scaled up or down based on your preference.
The Low and Slow Oven Method
Now comes the heart of the process: cooking your fall off the bone ribs in the oven. The low and slow method is the gold standard for oven ribs. It uses gentle heat over a long period to break down tough connective tissues and render fat beautifully.
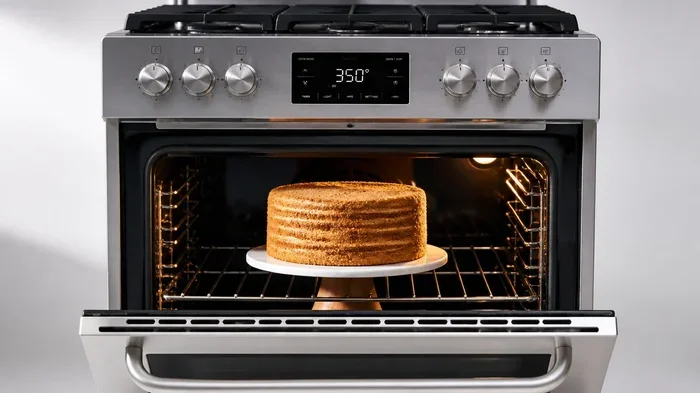
Preheat your oven to 275°F (135°C). This low temperature is the sweet spot for tender, juicy ribs. While the oven heats up, prepare a baking dish or roasting pan. You can place the ribs directly on the rack, but using a baking rack set inside a pan makes cleanup much easier and allows air to circulate around the meat.
Place the ribs meat-side down in the oven and cook for about two and a half to three hours. The exact cooking time depends on the type of ribs and the thickness of the meat. Baby back ribs usually take less time, while spare ribs need a bit more patience.
The 3-2-1 Method Explained
The 3-2-1 method is one of the most popular techniques for making oven ribs that are tender and flavorful. Here is how it works:
- First 3 hours: Cook the ribs unwrapped in the oven at 275°F. This allows the meat to absorb the smoky flavor from the rub and start rendering fat.
- Next 2 hours: Wrap the ribs tightly in heavy-duty aluminum foil with a splash of apple juice, cider vinegar, or broth. This creates a steamy environment that tenderizes the meat further.
- Final 1 hour: Unwrap the ribs, brush them with barbecue sauce, and return them to the oven uncovered. This lets the sauce caramelize and form a sticky, glistening glaze.
The 3-2-1 method works beautifully because it balances moisture, flavor, and texture. The first phase builds deep flavor, the second phase ensures tenderness, and the third phase creates that gorgeous caramelized finish that makes BBQ ribs so irresistible.
Wrapping vs. Not Wrapping
Some cooks prefer to leave their ribs unwrapped the entire time. This is sometimes called the “Texas crutch” when done with foil, or the “naked” method when done without any wrapping. Wrapping does speed up cooking and keeps the meat moist, but leaving ribs uncovered the whole time produces a firmer bark.
For beginners learning how to make fall off the bone ribs, the 3-2-1 method with foil wrapping is the safest bet. It is forgiving and produces consistently great results. As you gain experience, you can experiment with different wrapping techniques to find your personal preference.
Checking for Doneness
Knowing when your ribs are done is one of the most important skills in making oven ribs. There are several reliable methods to check for doneness, and using more than one gives you the best confidence.
The most accurate way is to use a meat thermometer. Insert it into the thickest part of the meat, avoiding the bone. You are looking for an internal temperature of around 195°F to 203°F (90°C to 95°C). At this range, the collagen has fully broken down and the meat is fall off the bone tender.
Another classic test is the bend test. Pick up the rack of ribs from one end with a pair of tongs. If the meat cracks slightly on the surface and bends but does not fall apart, they are ready. If the meat is still stiff and does not bend, they need more time.
Common Signs of Done Ribs
- The meat has pulled back from the bones by about a quarter inch.
- The rack bends easily when held from one end.
- The internal temperature reads between 195°F and 203°F.
- A toothpick or skewer slides into the meat with very little resistance.
- The ribs feel jiggly and loose when you shake them gently.
Do not rely on time alone. Every oven is different, and the thickness of your ribs varies. The meat thermometer and the bend test together give you the most reliable results for making tender ribs in the oven.
Adding the Glaze and Finishing Strong
The final step is where your BBQ ribs go from great to absolutely spectacular. Applying a glaze or barbecue sauce during the last phase of cooking creates a beautiful caramelized exterior that is both sweet and tangy.
There are many store-bought sauces available, but making your own rib glaze is surprisingly easy and tastes so much better. A simple glaze can be made by mixing barbecue sauce with a little honey, apple cider vinegar, and a dash of Worcestershire sauce. Brush this generously onto the ribs during the final hour of cooking.
Be careful not to add the sauce too early. The sugars in the sauce can burn if exposed to heat for too long. The last 60 minutes is the perfect window. Apply two to three thin layers, allowing each layer to set before adding the next. This creates a thick, sticky, caramelized coating that is the hallmark of great oven ribs.
Glaze Ideas to Try
- Classic Sweet: Barbecue sauce with brown sugar and honey.
- Spicy Kick: Add chipotle peppers in adobo sauce to your glaze.
- Asian-Inspired: Soy sauce, ginger, and a touch of sesame oil.
- Smoky Sweet: Barbecue sauce mixed with a little liquid smoke and molasses.
Once the ribs are glazed, you can finish them under the broiler for two to three minutes to get extra caramelization. Watch them closely during this step to prevent burning. The goal is a deep, glossy, slightly charred finish that makes your fall off the bone ribs look as good as they taste.
Common Mistakes to Avoid
Even experienced cooks can make mistakes when preparing pork ribs in the oven. Knowing what to avoid saves time, ingredients, and a lot of frustration.
Mistake 1: Cooking at Too High a Temperature
This is the number one mistake people make. High heat dries out the meat before the collagen has time to break down. Stick to 275°F and resist the temptation to turn up the heat to speed things along. Great oven ribs demand patience.
Mistake 2: Skipping the Membrane Removal
That thin membrane on the back of the rack is tough and chewy. Removing it is a quick step that makes a huge difference in the texture of your tender ribs. Do not skip it.
Mistake 3: Using Too Much Sauce Too Early
Sauces with sugar burn easily. Adding too much too early creates a bitter, blackened exterior instead of a sweet, caramelized glaze. Keep the sauce for the final hour only.
Mistake 4: Not Letting the Ribs Rest
After cooking, let your ribs rest for 10 to 15 minutes before cutting. This allows the juices to redistribute throughout the meat. Cutting too early results in dry, less flavorful ribs.
Mistake 5: Overwrapping in Foil
When using the 3-2-1 method, make sure the foil is tight but not so tight that it creates a complete seal. You want some steam to escape. Overwrapping can make the meat soggy instead of tender.
Serving and Storing Your Ribs
Once your fall off the bone ribs are done, it is time to serve them up. Classic sides like coleslaw, cornbread, baked beans, and potato salad pair perfectly with oven ribs. The sweet and smoky flavors of BBQ ribs go wonderfully with tangy, crunchy, or creamy sides.
To serve, use a sharp knife or kitchen shears to cut between the bones. This gives you individual portions that are easy to handle and eat. Arrange the ribs on a platter, drizzle with any remaining juices from the pan, and serve immediately.
Storing Leftover Ribs
Leftover ribs store beautifully in the refrigerator for up to four days. Place them in an airtight container or wrap them tightly in foil. To reheat, warm them in the oven at 250°F with a splash of broth or apple juice to keep them moist. Avoid microwaving, which tends to dry out the meat.
You can also freeze cooked ribs for up to three months. Wrap them tightly in plastic wrap and foil, or place them in a freezer-safe bag. Thaw overnight in the refrigerator before reheating. This is a great way to meal prep and enjoy fall off the bone ribs all week long.
Expert Tips for Next-Level Ribs
Ready to take your oven ribs to the next level? These expert tips will help you elevate your game and impress everyone at your table.
Use a smoke box or wood chips. Even in a regular oven, you can add a subtle smoky flavor by placing a small smoke box or foil pouch with soaked wood chips on the bottom rack. Hickory, applewood, and cherry wood all work wonderfully with pork ribs.
Double rub for extra flavor. Apply a light layer of rub before refrigerating, then add another layer right before cooking. This creates a deeper, more complex flavor profile in your bone-in ribs.
Brush with mustard as a binder. Before applying the dry rub, brush a thin layer of yellow mustard on the ribs. It acts as a glue for the rub and adds a tangy base flavor that disappears during cooking. This is a favorite trick among competitive BBQ rib makers.
Experiment with different liquids for wrapping. Instead of plain water or broth, try apple cider, beer, or even pineapple juice in your foil wrap. Each adds a unique flavor dimension to your fall off the bone ribs.
Final Thoughts
Making fall off the bone ribs in your home oven is one of the most rewarding things you can do in the kitchen. It does not require expensive equipment or years of experience. With the right approach, a little patience, and attention to detail, you can create ribs that are tender, juicy, and bursting with flavor.
Remember that the key to great oven ribs is the low and slow method. Take your time with the preparation, respect the cooking process, and do not rush the final glaze. Every step matters, and every step brings you closer to a plate of ribs that will have everyone coming back for seconds.
Now that you have all the tools and knowledge you need, it is time to fire up your oven and put these tips into action. Whether it is a holiday gathering, a weekend family dinner, or just because you are craving incredible BBQ ribs, your home oven is ready to deliver. Happy cooking!
Frequently Asked Questions
Can I use a different type of meat besides pork ribs?
While pork ribs are the most popular choice, you can also make fall off the bone ribs with beef ribs using the same low and slow oven method. Beef back ribs and short ribs both work well, though cooking times may vary slightly. Adjust your seasoning to complement the richer flavor of beef.
How long do I cook ribs in the oven at 275°F?
Most racks of ribs take between 4 and 6 hours total at 275°F using the 3-2-1 method. Baby back ribs are on the shorter end, while spare ribs may need the full six hours. Always check the internal temperature with a meat thermometer rather than relying solely on the clock.
Can I skip the foil wrapping step?
Yes, you can cook ribs uncovered the entire time. This produces a firmer bark and a slightly chewier texture compared to the wrapped method. If you skip the foil, add about 30 extra minutes to the total cooking time and check for tenderness regularly.
What is the best barbecue sauce for oven ribs?
The best barbecue sauce is the one you enjoy most. Thick, sweet, tomato-based sauces work great for oven ribs because they caramelize well. If you prefer a thinner sauce, add a little honey or molasses to help it stick to the ribs during the final glazing phase.
Why are my ribs tough even after long cooking?
Tough ribs usually mean the temperature was too high or the cooking time was insufficient. Collagen needs sustained low heat over several hours to break down into gelatin. Make sure your oven is calibrated correctly and maintain a steady 275°F throughout the entire oven cooking time.
Can I prepare the rub the night before?
Absolutely. In fact, preparing the dry rub the night before is highly recommended. Refrigerating the ribs with the rub overnight allows the flavors to penetrate deeply into the meat, resulting in more flavorful and tender fall off the bone ribs the next day.
=== CONCLUSION ===
Making fall off the bone ribs in your home oven is a skill anyone can learn. The process combines simple preparation, patient cooking, and a flavorful finish to create ribs that are truly unforgettable. From selecting the right rack of bone-in ribs to applying the perfect dry rub, wrapping with foil, and adding a caramelized glaze, every step plays a vital role in the final result.
The beauty of oven ribs is their consistency. Unlike outdoor grilling, your oven provides steady, even heat that delivers perfectly tender ribs every single time. With the 3-2-1 method and the tips shared in this guide, you are well equipped to make BBQ ribs that rival any professional pitmaster’s work.
Now it is your turn. Gather your ingredients, preheat that oven, and start your journey to making the best fall off the bone ribs right in your own kitchen. Your family and guests will thank you for it.