What To Do Before Self Cleaning Oven For Best Results
Knowing what to do before self cleaning oven saves time, prevents damage, and ensures sparkling results every time. This guide walks you through essential prep steps like removing racks, ventilating your kitchen, and tackling tough grime beforehand. Follow these simple tips to protect your oven and get the best outcome from every cleaning cycle.
Key Takeaways
- Remove all oven racks and accessories before starting the self-cleaning cycle to prevent warping and damage.
- Ventilate your kitchen by opening windows and turning on fans to reduce smoke and odor during the high-heat cycle.
- Wipe away heavy grease and food residue manually first for a more effective self-cleaning result.
- Never use chemical oven cleaners alongside the self-cleaning function, as they can produce toxic fumes at high temperatures.
- Set the right temperature and timing based on your oven type — pyrolytic or steam-clean — for optimal performance.
- Inspect the oven door seal and surrounding area to ensure nothing blocks the cleaning process.
- Allow the oven to cool completely before reinserting racks and wiping down the interior.
📑 Table of Contents
Understanding Your Self Cleaning Oven
A self cleaning oven uses high heat or steam to burn off food residue and grease inside the oven cavity. Most modern ovens come with this built-in feature, and it is a huge time-saver. But the feature works best only when you prepare properly beforehand.
There are two main types of self cleaning ovens on the market today. The first is the pyrolytic cleaning oven, which heats the interior to around 900 degrees Fahrenheit. This extreme temperature turns food residue into ash that you can easily wipe away. The second type is the steam cleaning oven, which uses lower temperatures and water to loosen grime. Both methods are effective, but they require different preparation steps.
Understanding which type of oven cleaning cycle your appliance uses matters a lot. Pyrolytic cycles run longer and reach higher temperatures. Steam cycles are shorter and gentler. Each one has unique requirements that affect how you should prep your oven.
Before you press any button, take a moment to read your oven manual. Every brand has slightly different instructions. Some ovens have a lock mechanism that engages automatically during the cleaning cycle. Others require you to lock the door manually. Knowing these details ahead of time prevents surprises.
Why Preparation Matters
Skipping prep steps can lead to smoke, odors, and even damage to your oven. When food debris and grease build up inside the oven interior, the self-cleaning cycle can produce a lot of smoke. Heavy residue may also create stubborn stains that the cycle cannot fully remove. Proper preparation reduces all of these risks.
Taking the time to prepare also extends the life of your oven. The high heat used in self-cleaning puts stress on internal components. When the oven is already clean and free of large debris, the cycle runs more efficiently. This means less wear and tear on the heating elements and door seals over time.
Removing Oven Racks and Accessories
The very first thing you should do is remove the oven racks, baking trays, and any other accessories. Most manufacturers strongly advise against leaving racks inside during the self cleaning oven cycle. The extreme heat can cause metal to warp or discolor permanently.
Here is a simple checklist of items to remove before starting the cycle:
- Oven racks — these can warp under intense heat
- Baking trays and sheets — metal can discolor
- Oven thermometers — glass or digital thermometers may break
- Rack guards or heat shields — remove any metal inserts
- Aluminum foil — even small pieces can melt and cause smoke
Once removed, wash your racks and trays by hand using warm soapy water. This gives them a head start on cleaning. You can also use a baking soda paste to tackle stubborn stains on racks. Let them soak for 15 to 20 minutes before scrubbing.
Where to Place Removed Accessories
Set your removed accessories on a clean towel or tray near the sink. This keeps your workspace organized. It also prevents you from accidentally leaving a rack inside the oven and forgetting about it before starting the cycle.
Some people wonder whether they should clean the oven door glass at this stage. The answer is yes, but only the exterior and the inner glass panel. Avoid using harsh abrasive cleaners on the interior glass, as the self cleaning cycle will handle that part. A simple wipe with a damp cloth removes surface dust and grease.
Ventilating Your Kitchen Properly
Ventilation is one of the most overlooked steps in oven cleaning. When the self cleaning oven cycle starts, it reaches extremely high temperatures. This causes smoke, odors, and sometimes even fumes from any remaining food residue.
Open windows in your kitchen before you begin. Turn on your range hood or exhaust fan at full speed. If you have a window fan, point it outward to push smoke outside. These simple steps make a big difference in air quality during the cycle.
Here are some quick ventilation tips:
- Open at least two windows for cross ventilation
- Turn on the exhaust fan 15 minutes before starting the cycle
- Keep pets away from the kitchen during the cleaning process
- Close doors to other rooms to contain odors
- Stay nearby and monitor the oven throughout the cycle
Managing Smoke and Odors
Even with proper prep, some smoke is normal during a pyrolytic cleaning cycle. The amount of smoke depends on how much food residue is inside. This is exactly why wiping away heavy grease beforehand matters so much. Less residue means less smoke and fewer odors.
If you notice excessive smoke, check the oven interior for large pieces of food. Burnt-on pizza crusts or spilled sauces can produce more smoke than the cycle can handle. Removing these manually before starting saves you from a smoky kitchen.
After the cycle finishes, the oven door lock will release automatically on most models. Wait for the oven to cool down before opening the door. Opening too early can let in fresh air that stirs up ash particles.
Cleaning Before the Cleaning Cycle
This might sound counterintuitive, but cleaning the oven manually before running the self cleaning cycle produces better results. Think of it as a pre-treatment step. The self cleaning oven works best on light to moderate grime, not thick layers of baked-on grease.
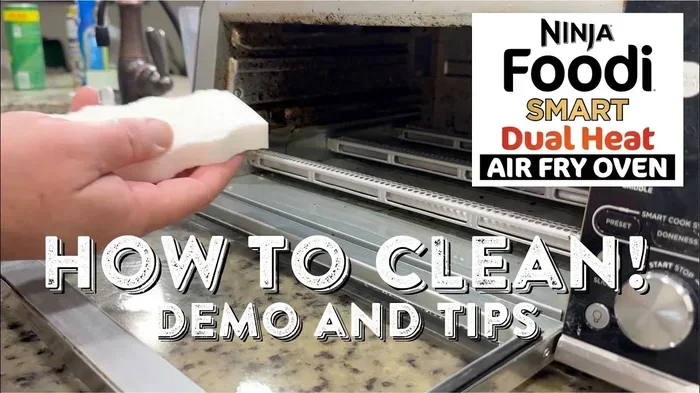
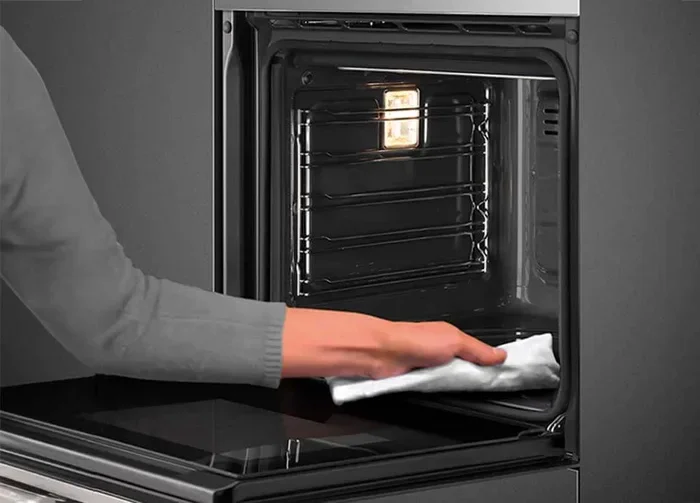
Start by wiping the interior with a damp cleaning cloth. Use warm water and a small amount of mild dish soap. Focus on areas with visible food spills and grease buildup. Avoid using paper towels for this step, as they can leave behind lint that burns during the cycle.
Tackling Tough Stains
For stubborn stains, make a paste from baking soda and water. Spread a thin layer over the stained areas and let it sit for 30 minutes. The baking soda gently breaks down grease without producing toxic fumes. Wipe it away with a damp cloth before starting the cycle.
Here are some effective pre-cleaning methods:
- Baking soda paste — mix three parts baking soda with one part water
- White vinegar spray — spray on after the baking soda paste for a fizzy reaction that lifts grime
- Damp cloth wipe — simple but effective for light residue
- Rubber scraper — gently remove large chunks of burnt food without scratching surfaces
Never use commercial oven cleaner spray before a pyrolytic cleaning cycle. These chemicals are not designed to withstand extreme heat. When the oven reaches high temperatures, residual cleaner can produce dangerous fumes. This is a critical safety point that many people overlook.
Safety Precautions During the Self Cleaning Cycle
Safety should always come first when using a self cleaning oven. The high temperatures involved pose real risks if you do not take proper precautions. Taking a few minutes to prepare your kitchen and your family for the process prevents accidents.
Keep children and pets out of the kitchen during the entire cleaning cycle. The oven exterior gets very hot, and the door glass can reach high temperatures as well. Make sure everyone in the house knows the oven is running and should not be touched.
What to Expect During the Cycle
A typical pyrolytic cleaning cycle lasts between two and four hours. The oven door locks automatically for safety. You will hear the oven working and may see smoke coming from the vents. This is completely normal and not a cause for alarm.
Steam cleaning cycles are much shorter, usually around 20 to 30 minutes. They produce less smoke and odor. However, you still need to prepare the oven interior the same way — remove racks and wipe away heavy residue.
Here is a comparison of the two cleaning methods:
| Feature | Pyrolytic Cleaning | Steam Cleaning |
|---|---|---|
| Temperature | Around 900°F | Around 200°F |
| Duration | 2 to 4 hours | 20 to 30 minutes |
| Smoke Production | Moderate to high | Low |
| Best For | Heavy grease and baked-on residue | Light to moderate grime |
| Rack Removal Required | Yes | Yes |
| Cooling Time | 1 to 3 hours | 15 to 30 minutes |
Common Mistakes to Avoid
One of the biggest mistakes people make is using the self cleaning oven function with oven cleaner still inside. This creates toxic fumes that are harmful to breathe. Always rinse the oven thoroughly if you have used any cleaning product before running the cycle.
Another common error is starting the cycle without checking the oven door seal. A damaged or dirty seal can allow heat to escape, reducing cleaning effectiveness. Inspect the seal for cracks or food debris and clean it gently with a damp cloth before starting.
Some users also forget to remove small items from inside the oven. A forgotten piece of parchment paper or a small food wrapper can melt and produce smoke. Always double-check the oven interior before pressing start.
What to Do After the Cleaning Cycle
Once the self cleaning cycle finishes, the oven door will unlock. But do not open it immediately. Let the oven cool down for at least one to two hours. Opening the door too soon releases a burst of hot air and ash particles into your kitchen.
After cooling, open the door carefully and wipe out the ash with a damp cleaning cloth. Use a soft cloth or sponge — avoid abrasive scrubbers that could scratch the oven interior. The ash should come away easily with gentle wiping.
Reinsert your clean oven racks and accessories only after the interior is completely dry. Placing racks back in a damp oven can cause rust over time. If you notice any remaining stains, a quick wipe with a white vinegar solution usually does the trick.
Maintaining Your Oven Between Cycles
Regular maintenance reduces the need for frequent self cleaning cycles. Wipe up spills as soon as the oven cools down. Use oven liners on the bottom rack to catch drips and crumbs. These simple habits keep your oven cleaner for longer and make each cleaning cycle more effective.
Schedule a deep clean every three to six months depending on how often you cook. If you bake frequently or cook greasy foods, you may need to clean more often. A well-maintained oven runs more efficiently and lasts longer.
Expert Insights
According to appliance experts, the key to getting the most out of your self cleaning oven is preparation. A thorough pre-cleaning wipe-down reduces smoke, shortens the cycle, and improves results. Experts also recommend running the cleaning cycle during cooler months when you can open windows more easily for ventilation.
Professional oven technicians also advise against running the self cleaning cycle more than once a month. The high heat puts stress on the oven’s electronics and door mechanism. Routine maintenance with gentle cleaning between cycles keeps your oven in top shape without unnecessary wear.
One more tip from the experts: keep a box of baking soda in your kitchen specifically for oven maintenance. It is inexpensive, non-toxic, and incredibly effective for spot cleaning between deep cleans. A quick sprinkle and wipe can prevent buildup that would otherwise require a full self cleaning cycle.
Conclusion
Knowing exactly what to do before self cleaning oven transforms a potentially messy chore into a simple, effective process. From removing racks and accessories to ventilating your kitchen and wiping away tough grime, each prep step plays an important role. The more effort you put into preparation, the better your results will be.
Always prioritize safety. Keep children and pets away, never use chemical cleaners before the cycle, and inspect your oven for any leftover debris. These precautions protect both you and your appliance. With the right preparation, your self cleaning oven will deliver sparkling results with minimal effort.
Make oven cleaning part of your regular home maintenance routine. A clean oven cooks better, smells better, and lasts longer. Follow the steps in this guide every time, and you will enjoy the benefits of a fresh, well-maintained oven for years to come.
Frequently Asked Questions
Can I leave oven racks inside during the self cleaning cycle?
No, you should always remove oven racks before starting the self cleaning oven cycle. The extreme heat can warp or discolor the metal racks permanently. Wash them separately by hand or in the sink with warm soapy water before reinserting them after the cycle is complete.
How long does a self cleaning oven cycle take?
A pyrolytic cleaning cycle typically takes between two and four hours, depending on how dirty the oven is. Steam cleaning cycles are much shorter, usually lasting 20 to 30 minutes. Always check your oven manual for the exact timing recommended by the manufacturer.
Is the smoke during self cleaning normal?
Yes, some smoke is completely normal during a self cleaning oven cycle, especially with pyrolytic cleaning. The high heat burns off food residue and grease, which produces smoke. However, excessive smoke may mean there is too much residue left inside. Wiping the oven down before starting the cycle helps reduce smoke significantly.
Can I use commercial oven cleaner with a self cleaning oven?
No, you should never use commercial oven cleaner spray before running a pyrolytic cleaning cycle. The extreme heat causes chemical residues to produce toxic fumes that are dangerous to breathe. Stick to natural cleaners like baking soda and white vinegar for any pre-cleaning you need to do.
How often should I use the self cleaning function?
Most experts recommend using the self cleaning cycle no more than once a month. Running it too frequently puts unnecessary stress on the oven’s heating elements and door seals. Regular light wiping and maintenance between cycles reduces the need for frequent deep cleaning sessions.
What should I do if the oven door does not unlock after the cycle?
The oven door lock should release automatically once the cleaning cycle finishes and the interior cools down. If the door remains locked, wait at least one to two hours. If it still does not unlock, check the oven manual for troubleshooting steps or contact the manufacturer’s customer support for assistance.