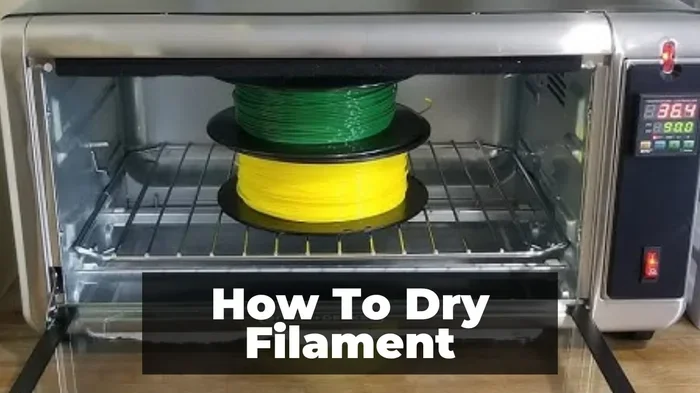
How To Dry 3D Printer Filament In Your Kitchen Oven
Drying 3D printer filament in a kitchen oven is one of the easiest and most affordable ways to restore wet filament and fix common print problems. Moisture causes bubbles, stringing, and poor layer adhesion, but a standard home oven can bring your filament back to peak condition in just a few hours. This guide walks you through the exact temperatures, timing, and safety steps for PLA, ABS, nylon, PETG, and other popular filament types.
If you have ever pulled a spool of filament off the shelf and heard a faint crackling sound, you already know what wet filament sounds like. That little noise tells you moisture has crept into the material, and it is about to cause problems for your prints. drying 3D printer filament in an oven is one of the simplest and most cost-effective fixes you can try at home.
Many people assume they need expensive equipment like a filament dry box or a vacuum chamber to get the job done. The truth is, your kitchen oven can do the same work for a fraction of the cost. Whether you use PLA filament, ABS filament, nylon, or PETG, this guide will show you exactly how to dry each type safely and effectively.
Wet filament is one of the most common causes of print failures, and yet it is one of the easiest problems to solve. Let us walk through everything you need to know about oven drying filament step by step.
Key Takeaways
- Oven drying works for most filament types: PLA, ABS, nylon, PETG, and TPU can all be dried safely at low temperatures.
- Temperature control is critical: Too much heat will warp or melt your filament, so always stay within the recommended range for each material.
- Drying times vary by filament type: PLA needs about 4-6 hours, while nylon may require 8-12 hours for thorough drying.
- Watch for warning signs of wet filament: Popping sounds, stringing, bubbled layers, and poor bed adhesion all signal moisture contamination.
- Store filament properly after drying: Use airtight containers, silica gel packs, or a filament dry box to keep moisture out long-term.
- A food thermometer helps ensure accuracy: Oven thermostats can be off by 10-25 degrees, so an independent thermometer adds a safety layer.
- Never use a microwave or toaster oven: These heat unevenly and can damage filament or create safety hazards.
📑 Table of Contents
- Why Moisture Ruins 3D Printer Filament
- Can You Use a Kitchen Oven for Drying Filament
- The Complete Guide to Drying Filament by Type
- Step-by-Step Oven Drying Process
- Signs Your Filament Is Properly Dried
- Common Mistakes to Avoid When Drying Filament
- Alternatives to Oven Drying for Filament
- How Often Should You Dry Your Filament
- Final Thoughts on Drying Filament in Your Oven
Why Moisture Ruins 3D Printer Filament
Most 3D printer filament materials are hygroscopic, which means they naturally absorb moisture from the air. This happens over time, especially if you leave your spool out in a humid room or garage. The moisture gets trapped inside the filament and causes a host of printing problems.
What Happens When Filament Gets Wet
When wet filament passes through the hot end of your printer, the water turns to steam. That steam has nowhere to go, so it creates defects in your print. Here are the most common symptoms of moisture contamination:
- Stringing and oozing: Excess moisture turns into steam as the filament melts, creating thin webs of plastic between parts of your print.
- Bubbling and popping sounds: You may hear crackling or popping from the nozzle as water vapor escapes the molten filament.
- Poor layer adhesion: Moisture weakens the bond between layers, causing your prints to delaminate or fall apart under stress.
- Brittle prints: Wet filament produces parts that feel fragile and crack easily, even if they looked fine during printing.
- Nozzle clogging: Steam can expand inside the hot end and partially clog the nozzle, leading to inconsistent extrusion.
- Surface defects: Your prints may develop rough surfaces, tiny holes, or uneven textures caused by trapped moisture.
These problems do not just ruin individual prints. They waste your time, your filament, and your patience. Drying filament in an oven removes the trapped moisture and restores the material to its original printing quality.
How Filament Absorbs Moisture
Different filament types absorb moisture at different rates. Nylon filament is one of the most hygroscopic materials available and can absorb significant moisture in just a few hours of exposure to humid air. PLA filament is less absorbent than nylon but still picks up moisture over time, especially in damp environments.
ABS filament and PETG filament fall somewhere in the middle. Even TPU filament, which is more resistant to moisture than rigid plastics, can absorb enough water to cause printing issues. The key takeaway is that all filament benefits from proper storage and occasional drying.
Can You Use a Kitchen Oven for Drying Filament
The short answer is yes. A standard kitchen oven works well for drying most types of 3D printing filament. Ovens provide consistent, even heat at low temperatures, which is exactly what you need. However, there are some important safety considerations to keep in mind.
Why a Kitchen Oven Works
A kitchen oven heats a closed space evenly, which allows the moisture inside the filament to evaporate slowly and uniformly. This slow drying process is much safer than using a heat gun or other direct heat source that can damage the filament. Most ovens can maintain temperatures as low as 150°F (65°C), which covers the drying needs of all common filament types.
Many people also use a food thermometer to verify their oven’s actual temperature. Oven thermostats can be inaccurate, sometimes off by 10 to 25 degrees. A simple oven thermometer from the kitchen aisle can save you from accidentally overheating your filament.
Safety Precautions for Oven Drying
Before you start, keep these safety tips in mind:
- Never use a microwave: Microwaves heat unevenly and can melt or catch fire near the filament spool.
- Never use a toaster oven on high: If you must use a toaster oven, set it to the lowest possible temperature and monitor it closely.
- Keep the oven clean: Remove any food residue before placing filament inside. Plastic fumes from overheated food can contaminate your filament.
- Ventilate your kitchen: Some filaments release mild fumes when heated. Open a window or turn on a range hood during the drying process.
- Stay nearby: Do not leave the oven running unattended for long periods. Check on the filament every hour or so.
- Use parchment paper or aluminum foil: Line the oven rack to protect it from any residual plastic oils or colorants that may leach out during drying.
The Complete Guide to Drying Filament by Type
Every filament material has its own ideal drying temperature and time. Using the wrong temperature can do more harm than good, so it is important to follow these guidelines carefully.
How to Dry PLA Filament
PLA filament is one of the most popular materials for beginner and intermediate 3D printing. It is also one of the easiest to dry. Set your oven to 45°C to 50°C (113°F to 122°F) and leave the filament inside for 4 to 6 hours. PLA has a relatively low glass transition temperature, so you must keep the heat gentle to avoid warping the spool or softening the filament.
A good practice is to dry PLA filament overnight. Set the oven before bed, turn it off in the morning, and let the filament cool inside the oven with the door closed. This slow cooling helps prevent condensation from forming on the filament surface.
How to Dry ABS Filament
ABS filament requires slightly higher drying temperatures than PLA. Set your oven to 60°C to 80°C (140°F to 176°F) and dry the filament for 4 to 6 hours. ABS is more heat-resistant, so it can handle a bit more warmth without deforming. However, you should still avoid exceeding 80°C to prevent the filament from becoming too soft.
ABS is particularly sensitive to moisture because it absorbs water quickly. If you live in a humid climate, consider drying your ABS spool more frequently, even if it has been stored in a sealed bag.
How to Dry Nylon Filament
Nylon filament is the most moisture-hungry of the common printing materials. It absorbs water aggressively and requires longer drying times. Set your oven to 70°C to 80°C (158°F to 176°F) and dry the filament for 8 to 12 hours. Some users even dry nylon for up to 24 hours if the filament has been severely exposed to moisture.
Because nylon absorbs so much water, you may notice significant popping and crackling during the first hour of drying. This is completely normal and means the moisture is being driven out of the material. The sound should quiet down as the filament dries further.
How to Dry PETG Filament
PETG filament sits between PLA and ABS in terms of heat tolerance. Set your oven to 55°C to 65°C (131°F to 149°F) and dry for 4 to 6 hours. PETG is a great all-around material, and keeping it dry ensures strong layer bonding and smooth surface finish.
One thing to watch for with PETG is oozing. If your prints start showing stringing even after drying, the filament may need more time in the oven or a slightly higher temperature.
How to Dry TPU Filament
TPU filament is a flexible material that requires careful handling during the drying process. Set your oven to 50°C to 55°C (122°F to 131°F) and dry for 4 to 6 hours. Because TPU is softer and more elastic than rigid filaments, excessive heat can cause it to become sticky or deform on the spool.
Keep a close eye on TPU during drying. If the filament starts sticking to itself or to the oven rack, lower the temperature and continue drying at the lower setting.
Step-by-Step Oven Drying Process
Now that you know the right temperatures and times for each filament type, let us walk through the actual process from start to finish.
Step 1: Gather Your Supplies
Before you begin, make sure you have everything ready:
- A clean kitchen oven
- An oven thermometer (optional but recommended)
- Parchment paper or aluminum foil
- A baking sheet or oven-safe tray
- Airtight storage containers or bags for after drying
- Silica gel packets for long-term storage
Step 2: Prepare the Oven
Line the oven rack with parchment paper or aluminum foil. This prevents any residue from the filament from sticking to your oven. Place a baking sheet on the rack to provide a flat, stable surface for the filament spool.
Set your oven to the correct temperature for your filament type. If you are using an oven thermometer, place it inside to verify the temperature is accurate.
Step 3: Prepare the Filament Spool
Remove the filament spool from its packaging. If the spool is in a sealed bag with silica gel packets, leave the packets inside. If the spool has been sitting out in the open, consider wrapping it loosely in aluminum foil to protect it from direct heat while still allowing airflow.
You can dry multiple spools at the same time if they are different materials, but make sure they are not touching each other or the oven walls. Good airflow around the spool helps moisture escape evenly.
Step 4: Place the Spool in the Oven
Carefully place the spool on the baking sheet or oven rack. Make sure the spool is centered and balanced so it does not tip over during drying. Close the oven door gently.
Step 5: Set a Timer and Monitor
Set a timer based on the recommended drying time for your filament type. Check on the filament every hour or so. You should not see any smoke or smell anything burning. If you do, turn off the oven immediately and lower the temperature.
Some users like to crack the oven door slightly during drying to allow moisture to escape. This is a good practice, especially for nylon, which releases a lot of water vapor during the drying process.
Step 6: Cool Down and Store
When the drying time is complete, turn off the oven and let the filament cool inside with the door closed. This prevents condensation from forming on the filament as it cools in humid room air. Once the filament is cool to the touch, remove it and store it in an airtight container with fresh silica gel packets.
Proper storage after drying is just as important as the drying process itself. Even freshly dried filament will absorb moisture again if left exposed to humid air.
Signs Your Filament Is Properly Dried
How do you know the drying process worked? There are several clear indicators that your filament has been successfully dried in the oven.
- No crackling or popping sounds: When you feed dried filament through your printer, you should hear smooth, quiet extrusion. Any crackling means moisture is still present.
- Clean, smooth extrusion: The filament should come out of the nozzle in a steady, consistent bead without stringing or oozing.
- Improved bed adhesion: Dry filament sticks to the print bed more reliably, reducing the number of prints that peel up or warp at the corners.
- Stronger layer bonding: Your prints will feel sturdier and more solid, with fewer visible layer lines or gaps between layers.
- Better color consistency: Wet filament can cause discoloration or splotchy surfaces. Dried filament produces clean, uniform color throughout the print.
If you are still experiencing print issues after drying, the problem may be something else entirely. Check your nozzle temperature, bed temperature, and print speed before assuming the filament is still wet.
Common Mistakes to Avoid When Drying Filament
Even with the best intentions, people make mistakes when drying filament in an oven. Here are the most common errors and how to avoid them.
Using Too High a Temperature
This is the number one mistake people make. Every filament type has a maximum safe drying temperature, and exceeding it can warp, soften, or even partially melt the filament. Always double-check the recommended temperature range for your specific material before setting the oven.
Drying for Too Short a Time
Some people set the oven for two hours and assume the filament is dry. For most materials, this is not enough time. Moisture trapped deep inside the filament core takes several hours to fully evaporate. Be patient and follow the recommended drying times.
Skipping the Cooling Phase
Pulling hot filament out of the oven and exposing it to room air immediately can cause condensation to form on the surface. This defeats the purpose of drying. Always let the filament cool inside the closed oven.
Reusing Old Silica Gel
If you store your dried filament with silica gel packets that have already absorbed moisture, they will not protect your filament. Replace or recharge your silica gel regularly. You can recharge used packets by drying them in the oven at a low temperature for a couple of hours.
Forgetting to Label Dried Filament
It is easy to lose track of which spools have been dried and which have not. Label each spool with the drying date and material type. This helps you use older stock first and keeps your workflow organized.
Alternatives to Oven Drying for Filament
While a kitchen oven is one of the best methods for drying filament, it is not the only option. Here are a few alternatives worth considering.
Filament dry boxes: These are enclosed containers with a built-in heating element and desiccant. They keep filament dry during printing and can gently heat the material to drive out moisture. Dry boxes are convenient but can be expensive for beginners.
Food dehydrators: A food dehydrator works on the same principle as an oven but uses lower, more controlled temperatures. If you have one sitting around the kitchen, it can double as a filament dryer.
Rice or silica gel storage: For light moisture exposure, storing filament in a sealed container with a generous amount of rice or fresh silica gel can pull moisture out over several days. This method works best as a maintenance strategy rather than a treatment for severely wet filament.
Desiccant air dryers: Some advanced setups use a stream of dry air blown over the filament during printing. This keeps the material continuously dry and is popular among serious hobbyists and professionals.
Each method has its pros and cons. A kitchen oven gives you the most control and the fastest results, making it the go-to choice for most users.
How Often Should You Dry Your Filament
The frequency of drying depends on your environment and how you store your filament. If you live in a dry climate and keep your spools in sealed bags with silica gel, you may only need to dry them once every few months. If you live in a humid area or leave your filament out on the shelf, you should dry it more often.
A good rule of thumb is to dry your filament whenever you notice print quality issues like stringing, poor layer adhesion, or bubbled surfaces. You can also dry filament proactively before starting an important print project where quality matters.
For nylon filament and other highly hygroscopic materials, consider drying every few weeks if you use them frequently. For PLA and ABS, a monthly drying routine during humid months is usually sufficient.
Final Thoughts on Drying Filament in Your Oven
Drying 3D printer filament in your kitchen oven is a simple, effective, and budget-friendly way to keep your prints looking their best. Whether you are dealing with a spool of wet PLA filament or a neglected bag of nylon that has been sitting in a damp garage, oven drying can restore your material to excellent printing condition.
The key is to respect the temperature limits for each filament type, be patient with drying times, and store your filament properly after the process is complete. With these habits in place, you will spend less time troubleshooting print defects and more time enjoying successful, high-quality prints.
Start with one spool of filament tonight. Set your oven to the right temperature, set a timer, and see the difference for yourself. Once you experience the improvement in print quality, drying filament will become a regular part of your 3D printing routine. Your prints will thank you.
Frequently Asked Questions
Can I dry any type of 3D printer filament in the oven?
Most common filament types can be dried in a kitchen oven, including PLA, ABS, nylon, PETG, and TPU. However, each material has its own safe temperature range, and you must follow those guidelines carefully. Exceeding the maximum temperature for any filament can damage it permanently.
How long does it take to dry filament in the oven?
Drying times vary by material. PLA typically needs 4 to 6 hours at 45 to 50 degrees Celsius. ABS requires 4 to 6 hours at 60 to 80 degrees Celsius. Nylon needs the longest time, usually 8 to 12 hours at 70 to 80 degrees Celsius. PETG and TPU fall in the 4 to 6 hour range at moderate temperatures.
Is it safe to use my kitchen oven for drying filament?
Yes, it is generally safe as long as you follow the recommended temperature guidelines and stay nearby while the oven is running. Make sure your oven is clean, ventilate the kitchen, and never leave the process unattended for extended periods. Using parchment paper on the rack protects the oven from any residue.
Can I reuse filament that has been dried before?
Absolutely. Dried filament can be reused multiple times as long as it is stored properly in an airtight container with silica gel packets between uses. Each time the filament absorbs moisture, you can simply dry it again in the oven following the same process.
What is the best way to store filament after drying it?
The best storage method is an airtight container or sealed bag with fresh silica gel desiccant packets. Some users also use a filament dry box with a built-in dehumidifier for continuous moisture protection. Keep your stored filament in a cool, dry place away from direct sunlight and humidity.
Will drying filament in the oven change its color or properties?
When done correctly at the right temperature, oven drying should not change the color or physical properties of your filament. However, overheating can cause discoloration, warping, or softening of the spool. Always stay within the recommended temperature range for each filament type to avoid any negative effects.
=== CONCLUSION ===
Drying 3D printer filament in your kitchen oven is one of the most practical skills you can develop as a 3D printing enthusiast. It saves you money, reduces waste, and dramatically improves your print quality. With the right temperature, the right timing, and a little patience, you can bring even the most moisture-damaged filament back to life.
Remember the key points: always check the recommended drying temperature for your specific filament type, never rush the drying time, let the filament cool slowly inside the oven, and store it properly afterward. These simple steps will keep your filament in excellent condition and your prints free of the frustrating defects caused by moisture.
Start experimenting with oven drying today. Try it with one spool, compare your print results before and after, and you will quickly see why this technique has become a standard practice in the 3D printing community. Your future prints will be cleaner, stronger, and more reliable thanks to this easy, affordable process.