How To Remove Microwave Oven From Wall Without Damage
Removing a wall-mounted microwave oven doesn’t have to be scary or messy. With the right tools and a little patience, you can take down your microwave safely and keep your walls looking perfect. This guide walks you through every step of the microwave removal process so you feel confident and prepared.
Have you ever stared up at your wall-mounted microwave and thought, “I need to get that down”? Maybe you’re replacing it, doing kitchen renovations, or just cleaning behind it. Whatever the reason, how to remove microwave oven from wall is a question many homeowners face. The good news? It’s totally doable on your own. You just need the right approach, some basic tools, and a bit of caution.
Wall-mounted microwaves are convenient, but they can be tricky to remove. The unit is secured with brackets, screws, and sometimes electrical connections. If you rush the process, you risk damaging the wall, the microwave, or even hurting yourself. That’s why we put together this complete guide. By the end, you’ll know exactly what to do, what tools to grab, and how to avoid the most common pitfalls. Let’s get into it.
Key Takeaways
- Turn off the power first: Always disconnect electricity before touching any wires or brackets.
- Use the correct tools: A stud finder, screwdriver, and drill make the job much easier and safer.
- Go slow and steady: Rushing can damage the wall, the microwave, or cause injury.
- Patch and repair afterward: Fill screw holes and inspect the wall cavity for any damage.
- Check for hidden support: Some wall-mounted microwaves have extra brackets inside the cabinet or drywall.
- Get help if needed: A second pair of hands makes handling the unit much safer.
📑 Table of Contents
Why You Might Need to Remove a Wall-Mounted Microwave
There are several reasons you might need to take down your wall mount microwave. Understanding your situation helps you plan the removal better. Here are the most common ones:
- Replacement: Your microwave is old or broken, and you need to install a new one.
- Kitchen renovation: You’re upgrading your cabinets, backsplash, or ventilation system.
- Deep cleaning: Grease and grime have built up behind the unit, and you need access.
- Wall damage: Water damage or mold behind the microwave requires inspection.
- Moving: You’re relocating and need to safely uninstall the unit.
- Upgrade: Switching from a traditional over-the-range model to a floating microwave or countertop unit.
No matter the reason, the removal process follows similar steps. The key is preparation. Before you start, make sure you understand what’s holding your microwave in place. Most wall-mounted units use a support bracket screwed into wall studs or a special mounting plate. Some also connect to the ventilation system above. Knowing this ahead of time saves you from surprises.
Also, keep in mind that the area around your microwave may get warm during use. If you’ve ever wondered about safe temperatures near your appliance, check out our guide on what is 350 F in Celsius fan oven for helpful temperature reference tips.
Tools and Supplies You Will Need
Gathering your tools before you start is one of the best things you can do. It keeps you from scrambling mid-job and helps the removal go smoothly. Here’s what you’ll need:
- Screwdriver set: Both Phillips and flathead heads. Most microwave brackets use standard screws.
- Drill with drill bits: Helpful for removing stubborn screws or patching holes later.
- Stud finder: Lets you locate the studs behind the drywall before and after removal.
- Pliers or wrench: Useful for any nuts or bolts holding the bracket in place.
- Flashlight: You’ll be working in a tight space above your counter.
- Drop cloth or old towel: Protects your countertop from scratches and catches any falling debris.
- Wire nuts and electrical tape: In case you need to cap exposed wires after disconnecting the microwave.
- Drywall patch kit: For filling holes after removal if the wall needs repair.
- Spare person: A helper makes handling the microwave unit much safer.
Having everything ready means you won’t have to stop halfway through. Trust me, that’s a game changer. Also, make sure your microwave is completely cool before you start working on it. The vent and exterior can retain heat for a while after cooking, especially after using the microwave vent for extended periods.
Step-by-Step Guide to Removing a Wall Microwave
Now for the part you’ve been waiting for. Here’s the full process for safely removing your wall-mounted microwave. Follow each step carefully, and you’ll have the unit down in no time.
Step 1: Disconnect the Power
This is the most important step. Do not skip it. Start by turning off the circuit breaker that powers the microwave. Look for the correct breaker in your electrical panel. If you’re unsure which one controls the microwave, turn off the main breaker to be safe.
Once the power is off, use a non-contact voltage tester near the wires to confirm there’s no current. Never assume the power is off just because you flipped a switch. Testing takes five seconds and could save you from a serious shock.
After confirming the power is off, unplug the microwave if it has a plug. Some hardwired models connect directly to the home’s electrical system. In that case, you’ll need to disconnect the wire nuts at the junction box behind the unit.
Step 2: Remove the Vent Cover and Grease Filter
Most wall-mounted microwaves have a ventilation system. Before you remove the main unit, take off the vent cover and grease filter. These usually lift out or twist off with minimal effort.
Set these parts aside in a safe place. You’ll want to clean them before reinstalling or replacing them. If you’re keeping the same microwave, a thorough cleaning at this stage makes a big difference in performance.
If you’re replacing the microwave, consider how the new unit handles ventilation. Some models use external ducting, while others use recirculating charcoal filters. Understanding this now saves headaches later during the microwave installation of your new appliance.
Step 3: Locate and Remove the Mounting Bracket
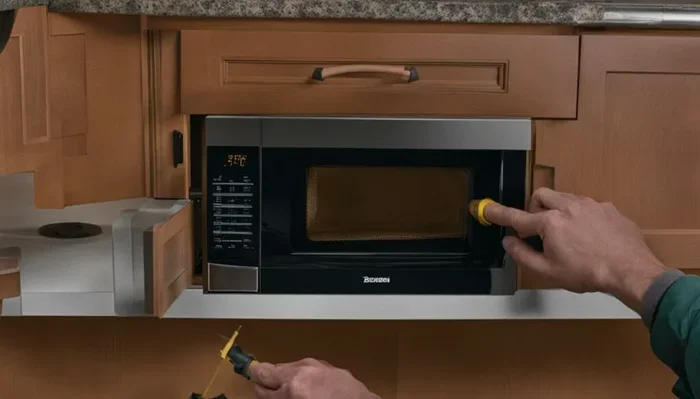
Now it’s time to find the bracket that holds the microwave to the wall. Look behind the unit. You’ll typically see a metal support bracket attached to the back of the microwave and screwed into the wall studs.
Use your flashlight to get a good look. You’ll probably find two or three screws holding the bracket in place. Carefully remove each screw and keep them in a small bowl or container so they don’t get lost.
Once all the screws are out, gently slide the bracket away from the wall. Some brackets detach easily, while others may need a little wiggling. If a screw feels stuck, try spraying a little penetrating oil around it and waiting a few minutes before trying again.
Here’s a pro tip: if your microwave is over the range, the bracket might also connect to the exhaust fan housing. Check for any additional screws or clips that secure the unit to the range hood. This is a step many people miss, and it can make the whole removal much harder.
Step 4: Detach the Microwave From the Bracket
With the bracket removed, you now need to separate the microwave from the wall. This is where having a helper really pays off. The microwave is heavier than it looks, and dropping it can cause serious damage.
Have your helper support the bottom of the unit while you carefully pull it forward and away from the wall. Some models slide off the bracket easily, while others may have a locking mechanism that needs to be released first.
Set the microwave down gently on a padded surface. Lay it on its back with a towel underneath to protect the casing and the glass turntable inside.
If you’re planning to reinstall the same unit somewhere else, you might want to check whether your new location is suitable. Items like glass cookware and certain containers need to be oven safe for the surrounding heat sources, so it’s worth reviewing safety guidelines. You can learn more about oven-safe materials in our article on are Pyrex oven safe for useful insights on heat-resistant kitchen items.
Step 5: Inspect the Wall and Fill the Holes
Now that the microwave is off the wall, take a close look at the wall cavity. You’ll likely see several screw holes and possibly some cracks in the drywall. This is completely normal, but you’ll want to address it before the wall looks rough.
Use a stud finder to check if any studs were damaged during removal. Most of the time, the holes are clean and easy to fix. Fill each hole with spackle or drywall compound. Let it dry completely, then sand it smooth with fine-grit sandpaper.
If the holes are larger than a pencil eraser, use a drywall patch kit. These kits are inexpensive and available at any hardware store. They make the repair look almost invisible once painted over.
While you’re up there, check the electrical junction box. Make sure it’s secure and in good condition. If you plan to install a new microwave, the junction box should already be in place and ready to go.
Step 6: Clean Up and Prepare for Reinstallation
With the wall repaired, take time to clean the area. Wipe down the wall, the countertop, and the microwave itself. Dust and grease tend to accumulate around the mounting area, especially if the unit has been in place for years.
If you’re reinstalling the same microwave, now is a great time to check all the parts. Inspect the bracket, screws, and any vent components. Replace anything that looks worn or damaged. A little preventive maintenance now extends the life of your appliance significantly.
If you’re moving the microwave to a new spot, make sure the new location can support the weight. Wall-mounted microwaves typically weigh between 30 and 50 pounds. The wall studs and bracket need to handle that load safely. Never rely on drywall alone to hold the unit.
Common Mistakes to Avoid During Microwave Removal
Even with the best intentions, people make mistakes when removing a wall microwave. Here are the most common ones and how to avoid them:
- Skipping the power disconnect: This is the number one mistake. Always turn off the breaker and test for live wires before starting.
- Not having a helper: Microwave ovens are heavier than you think. Trying to hold and remove the unit alone increases the risk of drops and injuries.
- Forcing stuck screws: If a screw won’t budge, don’t force it. Use penetrating oil or try a different screwdriver size. Forcing it can strip the head or damage the wall stud.
- Ignoring the ventilation connection: Many people forget that the microwave connects to the exhaust fan. Disconnect the vent duct carefully to avoid tearing it or the wall.
- Not checking for hidden brackets: Some models have secondary support brackets inside the cabinet area. Missing these can make removal difficult and potentially damage the cabinet.
- Rushing the wall repair: Skimping on drywall repair leads to visible holes and an unfinished look. Take the extra time to patch and sand properly.
Avoiding these mistakes saves you time, money, and frustration. It also keeps your kitchen looking great and your new microwave installation going smoothly.
Safety Tips and Precautions
Safety should always come first when working with any kitchen appliance that’s mounted on the wall. Here are some essential precautions to keep in mind:
- Always work with the power off. This cannot be stressed enough. Even if you think you’ve turned off the right breaker, test it.
- Wear safety glasses. Dust and debris can fall into your eyes while you’re working above your head.
- Use a sturdy ladder or step stool. Don’t stand on chairs or countertops. A stable platform keeps you balanced and safe.
- Keep children and pets away from the work area. A falling microwave can cause serious injury or property damage.
- Handle electrical connections with care. If you’re not comfortable working with wiring, hire a licensed electrician to disconnect the power supply.
- Lift with your legs, not your back. The microwave is awkward to carry. Proper lifting technique prevents back strain.
- Inspect the unit before moving it. Check for cracks in the housing or damage to the cord. A damaged microwave should be properly disposed of, not reused.
Following these safety tips makes the entire process much safer and less stressful. If at any point you feel unsure or uncomfortable, it’s perfectly okay to call a professional. There’s no shame in getting help, especially when it involves electricity and heavy lifting.
After removing the microwave, you might notice that the wall area around it feels warmer than other parts of the kitchen. This is normal, since wall-mounted units generate heat during use. If you’re concerned about how heat affects nearby surfaces, you may want to check whether items stored near the microwave, such as glass containers or plastic wraps, are safe at high temperatures. Understanding heat tolerance in the kitchen helps you make smarter choices about what to store near your appliances.
What to Do With Your Old Wall-Mounted Microwave
Once the microwave is down, you need to decide what to do with it. Here are your options:
- Donate it: If the unit still works, many charities and thrift stores accept functioning microwaves.
- Recycle it: Electronics contain materials that can be recycled. Check with your local waste management facility for e-waste recycling options.
- Store it: If you plan to reinstall it later, wrap it in moving blankets and store it in a dry place.
- Dispose of it properly: Many areas have specific rules for disposing of large appliances. Contact your local waste authority for guidance.
Whichever option you choose, make sure you handle the unit safely. The microwave contains components that should not be thrown in regular trash in many jurisdictions. Proper disposal protects the environment and keeps you on the right side of local regulations.
Final Thoughts
Removing a wall-mounted microwave oven is a project most homeowners can handle themselves with the right preparation. You’ve learned the tools you need, the step-by-step process, and the common mistakes to avoid. The key to success is patience and safety. Take your time, follow each step carefully, and don’t hesitate to ask for help when you need it.
Whether you’re replacing the unit, upgrading your kitchen, or just doing a deep clean, knowing how to remove microwave oven from wall without damage gives you confidence and saves you money. Your kitchen will look great, and you’ll have the satisfaction of completing the job yourself.
Now that your microwave is down, you have a blank canvas. Whether you’re installing a new model, switching to a different style, or just giving the wall a fresh coat of paint, you’re ready to move forward. Good luck with your project, and enjoy your newly refreshed kitchen space!
Frequently Asked Questions
Can I remove a wall microwave by myself?
Yes, most homeowners can remove a wall-mounted microwave on their own with the right tools and a helper. The process involves disconnecting power, removing the mounting bracket, and carefully sliding the unit off the wall. Always have someone assist you since the microwave can be heavy and awkward to handle alone.
How long does it take to remove a wall-mounted microwave?
For most people, the entire process takes about 30 to 60 minutes. The time varies depending on how securely the unit is mounted, whether the electrical connections are hardwired, and how much wall repair is needed afterward. Being prepared with all your tools helps keep the job moving quickly.
Do I need to hire an electrician to remove a wall microwave?
Not necessarily. If your microwave plugs into a standard outlet, you can simply unplug it after turning off the breaker. However, if the unit is hardwired directly into your home’s electrical system and you’re not comfortable working with wiring, hiring a licensed electrician is a smart choice for safety.
What should I do with the screw holes in the wall after removal?
Fill the screw holes with spackle or drywall compound, let them dry, and sand them smooth. For larger holes, use a drywall patch kit. Once the repair is dry, you can paint over it to match the rest of the wall. This leaves your wall looking clean and intact.
How heavy is a typical wall-mounted microwave?
Most wall-mounted microwaves weigh between 30 and 50 pounds. The weight varies depending on the size and model. Because of this weight, always have a helper support the unit during removal to prevent drops, injuries, or wall damage.
Can I reinstall the same microwave in a different location?
Yes, you can reinstall the same microwave in a new location as long as the new spot has proper wall support, an electrical connection, and adequate ventilation. Make sure the new wall location has studs strong enough to support the weight and that the mounting bracket fits correctly.