How To Cook Sourdough In Oven And Achieve Great Results
Learning how to cook sourdough in oven is simpler than you think. With the right temperature, timing, and a few proven techniques, you can bake bakery-quality sourdough bread at home. This guide walks you through every step, from starter prep to the final golden crust.
Baking sourdough bread in the oven is one of the most rewarding things you can do in the kitchen. There is something magical about pulling a warm, crusty loaf out of your oven and knowing you made it with just flour, water, salt, and a little patience. Whether you are a beginner or have been baking for a while, this guide will help you get great results every single time.
The process of baking sourdough in the oven might seem intimidating at first. But once you understand the basics, it becomes second nature. In this article, we will cover everything you need to know. From preparing your sourdough starter to nailing the perfect bake, you will find practical tips and clear steps. Let us dive in and make your next loaf amazing.
Key Takeaways
- Use the right oven temperature: Most sourdough bakes between 450°F and 500°F for the best crust and oven spring.
- A Dutch oven or baking stone makes a big difference: These tools trap steam and create that coveted crispy crust.
- Always let your dough ferment fully: Proper fermentation develops flavor and helps the loaf rise beautifully in the oven.
- Score your bread before baking: Scoring controls how the loaf expands and gives it that classic artisan look.
- Check internal temperature: A fully baked sourdough loaf reaches about 205°F to 210°F internally.
- Let it cool completely: Cutting too soon leads to a gummy crumb. Patience pays off.
📑 Table of Contents
Understanding Your Sourdough Before Baking
Before you even preheat your oven, the work starts with your dough. A successful sourdough bake depends on what happens before the loaf hits the heat. Understanding this will change the way you bake.
What Is a Sourdough Starter?
A sourdough starter is a living culture of wild yeast and bacteria. You feed it flour and water regularly, and it becomes the leavening agent for your bread. Unlike commercial yeast, a starter adds complex flavor and a natural tangy taste. If you do not have a starter yet, you can make one in about a week with just flour and water.
Your starter needs to be active and bubbly before you use it. A good test is the float test. Drop a small spoonful into a glass of water. If it floats, it is ready to go. If it sinks, give it more time or feed it again. Using an active starter is one of the most important sourdough bread baking tips you will ever learn.
The Role of Fermentation
Sourdough fermentation is the process where wild yeast and bacteria break down sugars in the dough. This creates carbon dioxide, which makes the bread rise. It also develops the tangy flavor that makes sourdough so special. Fermentation happens in two main stages: bulk fermentation and proofing.
During bulk fermentation, the dough rises as a whole. This is where the gluten network develops and the flavors start to form. After shaping, the dough goes through a final proof. Some bakers prefer a warm proof, while others do a cold proof in the refrigerator overnight. A cold proof adds more flavor and makes the dough easier to score. Both methods produce excellent results.
Choosing the Right Ingredients and Tools
The ingredients you use and the tools you have can make or break your homemade bread experience. Let us look at what matters most.
Ingredients That Matter
Great sourdough recipe results start with great ingredients. Here is what you need:
- Bread flour: This has a higher protein content, which gives your loaf a strong structure and a chewy crumb.
- Water: Use filtered water if your tap water is heavily chlorinated. Chlorine can slow down your starter and affect fermentation.
- Salt: Use fine sea salt or kosher salt. Salt controls yeast activity and adds flavor.
- Your active starter: This is the heart of your bread. Make sure it is fed and bubbly.
The sourdough hydration level refers to the ratio of water to flour. A hydration of around 70 to 75 percent is a good starting point for beginners. Higher hydration doughs are wetter and stickier but produce an open, airy crumb. Lower hydration doughs are easier to handle but yield a denser loaf.
Essential Baking Tools
You do not need a lot of equipment to bake sourdough loaf in the oven. But a few key tools will make a huge difference:
- Dutch oven: A Dutch oven traps steam and creates the perfect environment for a crispy crust. It essentially acts as your own mini steam oven.
- Baking stone or steel: These provide even heat distribution and help your bread get a great bottom crust.
- Lame or razor blade: You need this for scoring your bread before baking. A sharp blade makes clean, beautiful cuts.
- Parchment paper: This makes transferring your shaped dough into the oven much easier.
- Instant-read thermometer: This helps you check if your bread is fully baked inside.
If you are wondering whether your baking dish is safe for high-heat oven use, check out our guide on Are Pyrex Oven Safe to make sure your cookware can handle the heat.
Step-by-Step: How To Cook Sourdough In Oven
Now for the part you have been waiting for. Here is a clear, step-by-step process for how to cook sourdough in oven and get fantastic results every time.
Step 1: Mix and Knead Your Dough
Start by combining your flour, water, salt, and starter in a large bowl. Mix everything until no dry flour remains. The dough will look shaggy and rough at first. That is perfectly fine. Let it rest for about 30 minutes. This rest period, called autolyse, helps the flour absorb water and begins gluten development.
After the rest, knead the dough using the stretch and fold method. Wet your hands, grab one side of the dough, stretch it up, and fold it over the top. Rotate the bowl and repeat on all sides. Do this four times. Let the dough rest for 30 minutes, then repeat. You should do about four sets of stretch and folds over two hours. This gentle process builds strength in the dough without overworking it.
Step 2: Bulk Fermentation
Once your dough has gone through the stretch and folds, let it rise during bulk fermentation. This usually takes about 4 to 6 hours at room temperature, depending on how warm your kitchen is. Warmer kitchens speed up fermentation, while cooler kitchens slow it down.
Watch the dough, not the clock. You are looking for the dough to increase in size by about 50 to 75 percent. It should look puffy and bubbly. When you gently pull the dough, you should see a web of tiny bubbles. This tells you the fermentation is working well.
Step 3: Shape Your Loaf
Gently turn the dough out onto a lightly floured surface. Do not over-flour, as this can dry out the dough. Shape it into a round or oval loaf by folding the edges into the center and tightening the surface tension. A tight shape holds gas better and gives you a rounder loaf with a beautiful crust.
Place the shaped dough seam-side up in a floured banneton or a bowl lined with a floured towel. Cover it and let it proof. For a room-temperature proof, this takes about 1 to 2 hours. For a cold proof, place it in the refrigerator for 12 to 18 hours. The cold proof is my personal favorite because it adds so much flavor.
Step 4: Preheat Your Oven
This step is crucial. Preheat your oven to 450°F to 500°F at least 30 to 45 minutes before you plan to bake. If you are using a Dutch oven or baking stone, place it in the oven while it preheats. A hot oven and a hot baking vessel are essential for great oven spring, which is the final burst of rising that happens when the dough hits the heat.
If you are baking at 400°F, keep in mind that this lower temperature is better for thicker items like stuffing or casseroles. For sourdough, you want a higher temperature to get that crispy crust and dramatic rise.
Step 5: Score and Bake
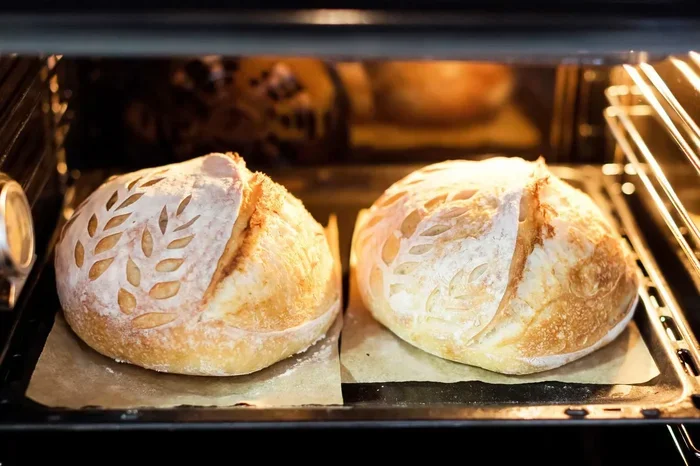
When your oven is fully preheated, carefully remove your hot Dutch oven or baking stone. Place your dough seam-side down onto parchment paper. Use a sharp lame or razor blade to score the top of the loaf. Score about half an inch deep at a 30 to 45 degree angle. Scoring gives the bread a place to expand and prevents it from bursting randomly.
Carefully lower the dough into the hot Dutch oven or onto the hot baking stone. Cover with the lid and bake for about 20 minutes. The trapped steam inside the Dutch oven keeps the crust soft, allowing the loaf to expand fully. After 20 minutes, remove the lid and bake for another 20 to 25 minutes until the crust is deep golden brown.
Step 6: Cool Completely
Once your bread is out of the oven, resist the urge to cut into it right away. Place the loaf on a wire rack and let it cool for at least one hour. The inside of the bread is still cooking as it cools, and the crumb needs time to set. Cutting too early releases steam and can make the inside gummy.
After an hour, tear into your loaf. You should see a beautiful open crumb with irregular holes and a slightly chewy texture. The crust should be crispy and crackly. If it is, you have nailed it.
Common Mistakes To Avoid
Even experienced bakers make mistakes. Here are some common ones and how to avoid them:
- Using an inactive starter: If your starter is not bubbling and active, your bread will not rise properly. Always do the float test before baking.
- Skipping the preheat: A cold oven means no oven spring. Always preheat for at least 30 minutes with your baking vessel inside.
- Cutting the bread too soon: This is the most common mistake. Wait at least one hour before slicing.
- Over-flouring the dough: Too much flour during shaping makes the dough dry and dense. Use just enough to prevent sticking.
- Baking at too low a temperature: Low temperatures result in pale crust and dense bread. Stick to 450°F or higher for the best results.
- Not enough steam: Steam in the first part of baking keeps the crust soft and allows maximum rise. A Dutch oven is the easiest way to achieve this at home.
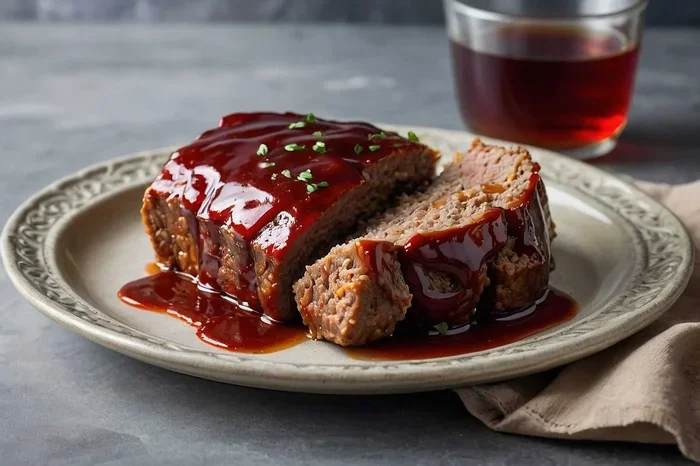
For more oven-baked recipes and tips, check out how to make barbecue meatballs in the oven to explore other delicious things you can bake at high temperatures.
Troubleshooting Your Sourdough Bake
Not every bake goes perfectly. Here are some common issues and what to do about them.
My Bread Is Dense and Heavy
A dense loaf usually means the dough did not get enough fermentation or the starter was not strong enough. Try increasing your bulk fermentation time or feeding your starter more actively before baking. Also, check that your oven is hot enough. A thermometer on your oven dial can help you verify the actual temperature.
My Bread Has a Pale Crust
Pale crust means the bread did not get enough heat or steam during baking. Make sure your oven is fully preheated. If you are not using a Dutch oven, try adding steam by placing a pan of water on the bottom rack. Brush the top of the loaf with water before baking for extra crispness.
My Bread Fell Apart After Baking
This usually happens when the dough was not strong enough to hold its shape. You may need more stretch and folds during mixing, or your shaping technique needs work. A tighter shape with good surface tension holds the loaf together better.
My Bread Is Too Sour
If your bread has too much tang, try shortening your fermentation time or reducing your bulk fermentation. A shorter, warmer fermentation produces less acidity. You can also reduce the amount of starter you use in your recipe.
Expert Tips for Perfect Sourdough Every Time
Here are some pro tips that separate good sourdough from great sourdough:
- Use a kitchen scale. Baking by weight is far more accurate than measuring by cups. A simple digital scale costs a few dollars and transforms your baking.
- Keep a baking journal. Write down your times, temperatures, and results each time you bake. This helps you track what works and what does not.
- Experiment with different flours. Try mixing bread flour with whole wheat or rye for more flavor and nutrition.
- Invest in a good Dutch oven. A quality Dutch oven retains heat well and gives you consistent results batch after batch.
- Be patient. Sourdough is a slow process. Rushing any step will show up in the final loaf. Good bread takes time.
When you pull a beautiful, golden loaf out of the oven, you will understand why so many people fall in love with baking sourdough at home. It is a craft that rewards patience and practice. Every loaf teaches you something new.
Final Thoughts
Learning how to cook sourdough in oven is a journey, not a destination. Every bake gives you a chance to improve and refine your technique. Start with the basics, follow the steps in this guide, and do not be afraid to experiment. The more you bake, the more intuitive the process becomes.
Remember that great sourdough bread comes from understanding your dough, using the right tools, and giving the process the time it needs. Whether you are baking for your family or sharing with friends, homemade sourdough is one of the most satisfying things you can create in the kitchen. So preheat your oven, feed your starter, and get ready to bake something wonderful.
With the tips and techniques in this guide, you are well on your way to baking sourdough loaf after sourdough loaf that rivals your favorite bakery. Happy baking.
Frequently Asked Questions
What temperature should I cook sourdough in the oven?
The ideal temperature for baking sourdough is between 450°F and 500°F. This high heat creates a crispy crust and strong oven spring. If you are using a baking stone or steel, preheat it in the oven for at least 30 minutes before baking.
How long does it take to bake sourdough in the oven?
Most sourdough loaves bake for about 40 to 50 minutes total. The first 20 minutes are usually done with the lid on to trap steam, and the remaining 20 to 25 minutes are baked uncovered until the crust is golden brown.
Can I bake sourdough without a Dutch oven?
Yes, you can. A baking stone or steel works well, and you can add steam by placing a pan of water on the bottom rack. However, a Dutch oven is the easiest and most effective tool for home bakers because it traps steam naturally.
Why is my sourdough not rising in the oven?
This could be caused by an inactive starter, insufficient bulk fermentation, or an oven that is not hot enough. Make sure your starter passes the float test, your dough has risen properly before baking, and your oven is fully preheated to at least 450°F.
How do I know when my sourdough is done baking?
Check the internal temperature with an instant-read thermometer. A fully baked sourdough loaf should reach 205°F to 210°F. The crust should be deep golden brown, and the loaf should sound hollow when you tap the bottom.
Can I use a regular baking pan instead of a Dutch oven?
You can, but the results will be different. A Dutch oven traps steam and creates a crispy crust similar to a professional steam-injected oven. A regular baking pan works fine but may produce a less dramatic crust. Line the pan with parchment paper for easy removal.