How To Toast Slivered Almonds In Oven For Best Results
Toasting slivered almonds in the oven is the easiest way to unlock their full flavor and crunch. This guide shows you exactly how to toast slivered almonds in oven with simple steps, perfect timing, and pro tips. Whether you are topping a salad or baking a cake, you will master oven-toasted almonds in minutes.
Key Takeaways
- Low and slow is the secret: Toasting at 325°F ensures even browning without burning.
- Stir halfway through: Promotes uniform color and prevents hot spots.
- Watch closely in the last 2 minutes: Almonds go from golden to burnt quickly.
- Cool completely before using: They will keep crisp as they cool.
- Store in an airtight container: Keeps them fresh for up to two weeks.
- Use parchment paper: Prevents sticking and makes cleanup a breeze.
📑 Table of Contents
- Why Toast Slivered Almonds?
- The Science Behind Toasting Almonds
- What You Need to Get Started
- How To Toast Slivered Almonds In Oven: Step-by-Step
- Oven Temperature and Timing Guide
- How to Know When They Are Perfectly Done
- Storing and Using Your Toasted Almonds
- Oven Toasting vs Stovetop Toasting
- Expert Tips and Quick Tricks
Why Toast Slivered Almonds?
Raw almonds are healthy and delicious. But toasted almonds? They take your dishes to the next level. The simple act of applying heat transforms them completely. You unlock a rich, nutty flavor that raw nuts simply cannot match. The texture also changes. They become golden, crisp, and satisfying to bite into. Whether you are topping a salad, mixing into cookie dough, or eating them straight, toasted almonds are a game-changer.
Learning how to toast slivered almonds in oven is one of the easiest kitchen skills you can develop. It requires no special equipment. It takes less than 15 minutes. And the results are far superior to anything you can buy pre-packaged. Store-bought toasted almonds often sit on shelves for weeks. They lose their freshness and crunch. When you toast them yourself, you control every step. You decide the color, the crunch level, and the timing. The difference in taste is remarkable.
The Flavor Transformation
When heat meets slivered almonds, something wonderful happens. The natural oils inside the nuts begin to warm. These oils carry the deepest flavors. As they heat up, they release a rich, buttery aroma. The natural sugars in the almonds start to caramelize. This creates a subtle sweetness and a complex flavor profile. Raw almonds taste mild and slightly grassy. Toasted almonds taste bold, warm, and nutty. The Maillard reaction, a chemical process that occurs when sugars and proteins meet heat, is responsible for this flavor boost. It is the same reaction that makes roasted coffee and toasted bread so delicious.
Raw vs Toasted Almonds
The contrast between raw and toasted almonds is striking. Raw almonds are soft, chewy, and pale. They have a gentle, neutral taste. Toasted almonds are firm, crisp, and golden brown. They have a deeper color and a much stronger aroma. In baking, toasted almonds hold their shape better. They do not sink into dough as easily. They also blend more evenly when chopped. For toppings, they stay crunchy longer. They do not get soggy quickly. If a recipe calls for oven-toasted almonds, it is because the baker wants that extra crunch and flavor. Skipping the toasting step means missing out on a key element of the dish.
The Science Behind Toasting Almonds
Understanding the science helps you control the outcome. When you apply heat to raw almonds, several things happen at once. First, the moisture inside the nuts begins to evaporate. This drying process is what creates the crisp texture. Second, the natural oils inside the almond start to migrate to the surface. These oils carry the flavor compounds. As they heat up, they release the deep, nutty aroma you love. Third, the Maillard reaction takes place. This is a chemical reaction between amino acids and reducing sugars. It produces hundreds of new flavor compounds. That is why toasted nuts taste so much more complex than raw ones. The Maillard reaction is also responsible for the beautiful golden brown color. It is not just a visual change. It is a flavor transformation.
The temperature matters a lot. Low heat allows the moisture to escape slowly and evenly. High heat causes the outside to burn before the inside dries out. This is why how to toast slivered almonds in oven at 325°F works so well. It gives the heat time to penetrate each thin slice. The almonds toast uniformly from edge to center. You get a consistent crunch and flavor throughout every piece.
What You Need to Get Started
The best part of how to toast slivered almonds in oven is how simple the preparation is. You do not need a lot of tools or ingredients. Just a few essentials will do the job perfectly.
Choosing the Right Almonds
Start with high-quality slivered almonds. These are thin, flat pieces cut from whole almonds. They toast much faster than whole almonds because of their thin shape. You can find them in the baking aisle of most grocery stores. Look for raw, unsalted almonds. Salted almonds can burn quickly and may leave a salty, bitter aftertaste. Check the package for a recent production date. Fresher almonds have more oil and a better flavor. Avoid any almonds that look dry, shriveled, or discolored. The quality of your nuts directly impacts the final result.
You can also use almond slices or baking almonds. These are very similar to slivered almonds. They are thin and uniform. The toasting process is the same. If you only have whole raw almonds, you can slice them yourself. Place a whole almond flat side down and use a sharp knife to slice it into thin pieces. This takes a few extra minutes but works in a pinch. Just make sure the pieces are roughly the same thickness for even toasting. Thinner pieces will crisp faster, so try to keep them uniform.
Essential Tools
You will need just a few basic kitchen tools:
- A rimmed baking sheet – This is the most important tool. The rim prevents the almonds from rolling off the oven rack. A standard half-sheet pan works perfectly.
- Parchment paper or a silicone baking mat – These prevent the almonds from sticking to the pan. Parchment paper is disposable and very convenient. A silicone mat is reusable and eco-friendly.
- A spatula or wooden spoon – You will use this to stir the almonds halfway through baking. A thin, flexible spatula works best for spreading them back into a single layer.
- A cooling rack – This allows air to circulate around the almonds as they cool. It prevents the bottoms from getting soggy from trapped steam.
- A timer – Your oven timer or a phone timer is essential. Toasting requires attention, and a timer keeps you on track.
None of these tools are expensive or hard to find. You likely already have them in your kitchen.
Selecting the Right Baking Sheet
The type of baking sheet you use matters more than you might think. Light-colored aluminum baking sheets are the best choice. They reflect heat and promote even browning. Dark, non-stick pans absorb more heat. This can cause the bottom of the almonds to scorch while the tops stay pale. If you only have a dark sheet, you can still use it. Just reduce the oven temperature by 15 degrees and keep a close eye on them. A rimmed sheet pan is essential. Sheet pans without rims allow the almonds to slide off into the oven. That is a mess you want to avoid.
How To Toast Slivered Almonds In Oven: Step-by-Step
Now that you have everything ready, let us walk through the process. How to toast slivered almonds in oven is straightforward, but paying attention to the details makes all the difference.
Preheat and Prep
First, preheat your oven to 325°F (165°C). This temperature is the sweet spot for even toasting. It is hot enough to brown the almonds but cool enough to prevent burning. While the oven is heating, line your baking sheet with parchment paper. Take your slivered almonds and spread them out in a single layer. The almonds should not overlap or pile up. Overcrowding creates pockets of steam. That leads to soggy, unevenly toasted nuts. You want each almond piece to have space and access to the hot air. A single layer also allows you to see the color change clearly.
Spread and Bake
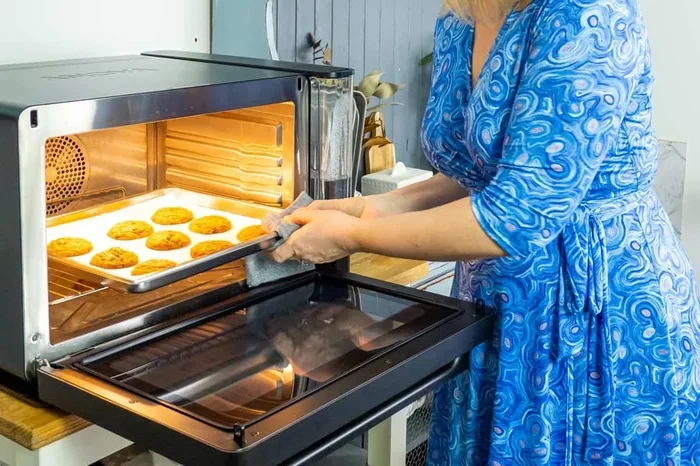
Place the prepared baking sheet on the middle oven rack. The middle rack allows hot air to circulate evenly around the almonds. Set a timer for 5 minutes. Do not leave the kitchen. The first few minutes are when the almonds begin to warm and release their first hints of aroma. After 5 minutes, open the oven door and use your spatula to gently stir the almonds. Move them from the edges of the pan to the center. The edges are hotter and brown faster. Spreading them out again ensures even cooking. Then close the oven door and set another timer for 5 minutes.
The Stirring Rule
Stirring is the single most important step. It prevents hot spots and promotes uniform color. After the second 5-minute interval, stir again. Then check the almonds every 2 to 3 minutes. The total baking time usually falls between 10 and 15 minutes. Your goal is a uniform golden brown color. The almonds will look slightly lighter than you think they need to be when you pull them out. They will continue to darken as they cool. This is called carryover cooking. Pulling them out a touch early is always better than waiting too long. Remember, toast almonds continue to crisp as they cool.
Oven Temperature and Timing Guide
Every oven is slightly different. Some run hot, some run cool. This guide helps you adjust for your specific situation. The table below compares three common oven settings.
| Oven Temperature | Baking Time | Result | Best For |
|---|---|---|---|
| 300°F (150°C) | 15-20 minutes | Light gold, very gentle toast | Delicate toppings, no-bake desserts, kids who prefer mild flavor |
| 325°F (165°C) | 10-15 minutes | Even golden brown, perfect crunch | General use, salads, baking, snacking |
| 350°F (175°C) | 8-12 minutes | Darker, more intense flavor | Quick recipes, bold snacking, adding to hot dishes |
The 325°F method is the safest and most reliable. It gives you a comfortable window of 10 to 15 minutes to monitor the almonds. You have time to stir and check without rushing. If you are in a hurry, 350°F works well but you must stay close to the oven. The almonds can go from perfect to burnt in just a couple of minutes. Avoid temperatures above 375°F. At that heat, the outside of the almonds will burn long before the inside is properly toasted. The result is a bitter, acrid taste that ruins the batch. Always use an oven thermometer if you are unsure about your oven’s accuracy. Many home ovens run 10 to 25 degrees off from the set temperature.
Quick Tips for Perfect Results
- Use a single layer. Do not stack the almonds or use a small pan that forces them to pile up. They need air circulation.
- Rotate the pan. If your oven has known hot spots, turn the pan 180 degrees halfway through baking.
- Set multiple timers. One for the halfway stir, one for the final check. This keeps you from getting distracted.
- Trust your nose. When your kitchen fills with a warm, nutty aroma, the almonds are close to done. Start checking visually.
- Pull them early. They will continue to crisp as they cool on the rack. You want them just slightly lighter than your ideal final color.
- Do not salt before toasting. Salt can cause the almonds to steam and lose their crunch. Add salt after they cool.
How to Know When They Are Perfectly Done
Knowing the exact moment to pull the almonds out is a skill you will develop quickly. It is easier than you think. You just need to pay attention to a few clear signs.
Visual Cues
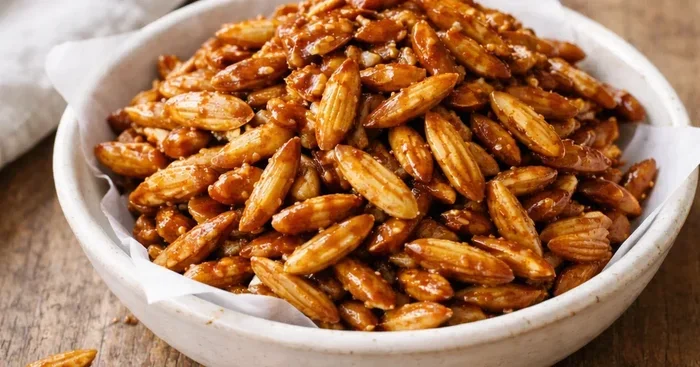
Look at the color. The almonds should be a uniform golden brown. Not dark brown, not pale yellow. They should look like a light caramel. The tips of the slivered almonds often darken first because they are thinner. That is normal. If you see any almonds that are very dark brown or black, the batch is already overdone. Those bitter almonds will affect the whole bowl. The entire batch should look slightly lighter than you think it needs to be. Remember, they will deepen in color as they cool.
Smell and Sound Tests
Your nose is one of the best tools for judging doneness. When the almonds smell rich, warm, and nutty, they are ready. You might also hear a faint crackling or popping sound. This is the last bit of moisture escaping from the nuts. It is a good sign. It means the almonds are drying out properly and becoming crisp. If the smell turns sharp, acrid, or burnt, take the pan out immediately. That is the sound of almonds going from perfectly toasted to ruined.
Common Mistakes to Avoid
Even experienced cooks make mistakes when toasting nuts. Here are the most common errors and how to avoid them:
- Using a dark baking sheet. Dark pans absorb more heat and can cause the bottom of the almonds to burn while the tops stay pale. Always use a light-colored aluminum baking sheet.
- Skipping the parchment paper. Almonds can stick to bare metal and burn onto the pan. Parchment paper creates a non-stick surface and prevents this mess.
- Leaving the oven door closed the entire time. You need to open the door to stir and check. Opening the door does not significantly affect the oven temperature if you keep the opening brief.
- Not transferring them off the hot pan. The baking sheet retains heat. If you leave the almonds on it after baking, they will continue to cook and may burn. Move them to a cooling rack right away.
- Storing them while still warm. Warm almonds release steam. That steam gets trapped in the storage container and makes them soft and chewy. Always cool completely before putting them in a jar or bag.
- Using salted almonds. Salt accelerates burning. Stick to raw, unsalted almonds for the best control over the toasting process.
Storing and Using Your Toasted Almonds
Once your almonds are perfectly toasted, you want to keep them at their best. Proper storage is simple and makes a big difference in how long they stay crunchy.
Cooling and Storing
Transfer the warm almonds to a cooling rack. Spread them out in a single layer. Let them cool completely at room temperature. This usually takes about 20 to 30 minutes. Once they are cool to the touch, they are ready to use or store. For storage, place them in an airtight container. A glass jar with a tight-fitting lid works wonderfully. You can also use a resealable plastic bag. Press out the extra air before sealing. Properly stored, toasted almonds stay fresh and crunchy for up to two weeks at room temperature. You can also store them in the refrigerator for up to one month. The cold slows down the oxidation of the natural oils, keeping them fresh longer. Never store them in the freezer. The moisture from condensation can make them soggy when they thaw.
Delicious Ways to Use Toasted Almonds
Now that you have a batch of perfect oven-toasted almonds, here are some delicious ways to use them:
- Salad topping: Sprinkle them over a mixed green salad for a satisfying crunch. They pair beautifully with goat cheese, pears, and a simple vinaigrette.
- Baking: Fold them into cookie dough, muffin batter, or bread dough. They add texture and a rich, nutty flavor.
- Snacking: Eat them plain as a healthy, protein-packed snack. Add a pinch of sea salt or a drizzle of honey for extra flavor.
- Yogurt or oatmeal: Top your morning yogurt or oatmeal with a handful. They add a lovely crunch and keep you full longer.
- Garnish for roasted vegetables: Scatter them over roasted broccoli, sweet potatoes, or green beans. They add a nutty contrast to the caramelized vegetables.
- Homemade almond butter: Blend them in a food processor until smooth. You will get a fresh, creamy almond butter with a deep, roasted flavor.
- Trail mix: Combine them with dried cranberries, dark chocolate chips, and pumpkin seeds for a homemade trail mix.
- Crumb topping: Pulse them in a food processor and use as a topping for fruit crisps or baked apples.
The flavor of toast almonds is so versatile. They work in both sweet and savory dishes. Once you have a batch ready, you will find yourself adding them to everything. They are a simple ingredient that makes a big impact.
Oven Toasting vs Stovetop Toasting
You might wonder why we focus on the oven instead of the stovetop. Both methods work, but they produce different results. Oven toasting is more hands-off and more even. The heat surrounds the almonds from all sides. This creates a uniform color and texture. Stovetop toasting in a dry skillet gives you more control over individual pieces. You can move them around constantly. But it requires constant attention. The skillet can create hot spots that burn some almonds while others stay pale. For how to toast slivered almonds in oven, the oven method is the clear winner for ease and consistency. It frees you up to prep other parts of your recipe while the nuts toast to perfection.
Expert Tips and Quick Tricks
Professional bakers and pastry chefs have refined their techniques over years of practice. Here are some expert insights that will elevate your how to toast slivered almonds in oven game.
Expert Insights from Professional Bakers
Chef Maria Torres, a pastry chef with over 15 years of experience, shares this simple rule: “I always toast at 325°F and I never leave the oven. The last two minutes are the most critical. You are watching for that shift from pale gold to deep gold.” She also recommends adding a tiny pinch of flaky sea salt immediately after the almonds come out of the oven. The warm, slightly oily surface of the almonds helps the salt stick perfectly. The result is a beautifully seasoned, crunchy almond that is ready to eat or use in recipes.
Another professional trick is to toss the almonds with a small amount of neutral oil before baking. This is optional, but it helps distribute heat evenly across each piece. It also gives the finished almonds a polished, slightly glossy look. Use a light oil like grapeseed or canola. Avoid olive oil for this application. Its strong, fruity flavor can overpower the delicate, buttery taste of the almonds. A teaspoon of oil for a single baking sheet is more than enough.
How to Toast Almonds with Spices
Take your toast almonds to the next level by adding spices before baking. Toss the slivered almonds with a tiny bit of oil and your choice of spices. Some great combinations include:
- Smoked paprika and a pinch of cayenne for a warm, spicy kick.
- Cinnamon and a touch of brown sugar for a sweet, aromatic treat.
- Rosemary and garlic powder for a savory, herby flavor that pairs with roasted vegetables.
- Maple syrup and a dash of sea salt for a sweet and salty snack.
Spread the spiced almonds in a single layer and follow the same 325°F toasting method. The spices will toast alongside the almonds and infuse every bite with flavor.
Key Takeaways for Your Next Batch
Before you head to the kitchen, here is a quick summary of the most important points:
- 325°F is your sweet spot. It balances speed, control, and flavor.
- Always use a single layer. Overcrowding leads to steaming and uneven color.
- Stir at the halfway mark. This simple step prevents most toasting problems.
- Cool on a rack, not the pan. It keeps the bottom crisp and prevents sogginess.
- Salt after cooling, not before. Salt draws out moisture and can make the almonds chewy.
- Store in a glass jar at room temperature. It keeps them fresh and looks beautiful on your counter.
Once you master how to toast slivered almonds in oven, you will use them in everything. They are a pantry staple that elevates both sweet and savory dishes. The process is simple, forgiving, and rewarding. With a little attention and practice, you will achieve perfect golden, crunchy almonds every single time.
The beauty of oven toasting is that it is a hands-off process. You do not need to stand over a hot skillet, stirring constantly. You do not need to guess when they are done. The oven does the work for you. While the almonds toast, you can prep the rest of your recipe, clean up the kitchen, or simply enjoy the wonderful aroma that fills your home. It is a small effort that yields a big reward.
Remember, practice makes perfect. Your first batch might not be exactly right. That is completely normal. Adjust the time by a minute or two next time based on what you observed. Soon you will know exactly when to pull them out. You will develop an instinct for the perfect golden color. Once you taste homemade oven-toasted almonds, you will never go back to store-bought. The flavor difference is night and day. They taste fresher, nuttier, and far more satisfying. So go ahead, preheat that oven, and bring out the best in your almonds. Your taste buds will thank you.
Toasting slivered almonds in the oven is one of the easiest ways to upgrade your cooking. It is a simple step that makes a huge difference. The process is forgiving, fast, and rewarding. You control the level of toast, from light and delicate to deep and bold. With the tips and techniques in this guide, you will achieve perfect results every time. How to toast slivered almonds in oven is a foundational kitchen skill. Once you have it, you will use it constantly. So go ahead, preheat that oven, and bring out the best in your almonds. Your taste buds will thank you.
Frequently Asked Questions
Can I toast almonds at 350 degrees instead of 325?
Yes, you can toast at 350°F, but you must watch them closely. The higher temperature shortens the baking time to about 8-12 minutes. The almonds can go from golden to burnt quickly, so stay near the oven and check them every 2 minutes.
How do I know if my slivered almonds are toasted enough?
Look for a uniform golden brown color and smell a rich, nutty aroma. The almonds will also sound slightly crackly as they cool. If they look pale, they need more time. If they have dark brown spots, they are already overdone.
Can I use salted almonds for toasting?
It is best to use raw, unsalted almonds. Salt can cause the almonds to steam and burn more easily. If you only have salted almonds, reduce the salt in your recipe and add a pinch of salt after toasting instead.
How long do toasted almonds stay fresh?
Stored in an airtight container at room temperature, toasted almonds stay fresh and crunchy for up to two weeks. In the refrigerator, they last up to one month. Always let them cool completely before storing to prevent moisture buildup.
Can I toast almonds on a baking sheet without parchment paper?
You can, but the almonds may stick and burn onto the pan. Parchment paper or a silicone baking mat creates a non-stick surface and makes cleanup much easier. It also prevents the almonds from absorbing any metallic taste from the pan.
What is the difference between slivered and sliced almonds for toasting?
Slivered almonds are cut on the bias and are slightly thicker. Sliced almonds are cut flat and are thinner. Both toast well, but slivered almonds hold their shape better and have a heartier crunch. Sliced almonds toast slightly faster due to their thinness. You can use either for the same toasting method.